Setting Up PASS-IPA for use with Navitia
When third-party Navitia software is used for trip planning, the following steps should be taken to set up PASS-IPA.
Procedure
-
Define Navitia-related system properties:
-
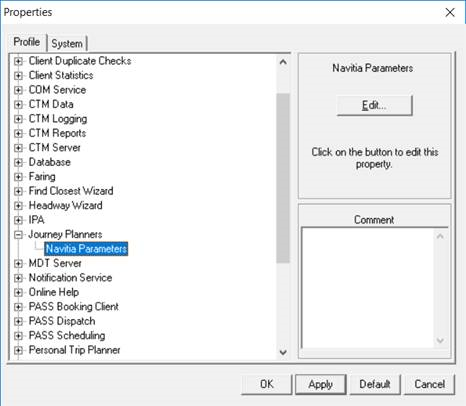
On the Profile tab, navigate to .
-
Define parameter options as needed:
Default values are the default values used by Navitia.
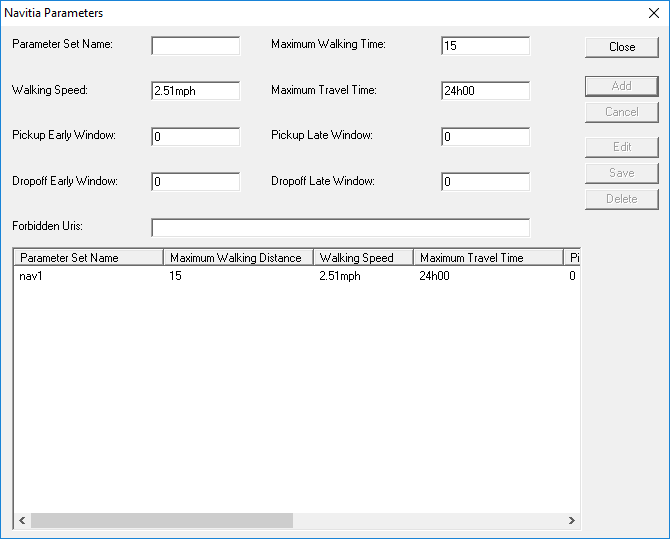
- Parameter Set Name
- Name of the parameter set.
- Maximum Walking Time
- Total amount of time clients are allowed to walk during their trips. Values are defined based on the Time span property set in on the Formats tab.
- Walking Speed
- Average walking speed for clients walking between points during their trip. Values are defined based on the Speed property set in on the Formats tab.
- Maximum Travel Time
- Maximum amount of time clients are allowed to travel between points (including walking time). Values are defined based on the Time span property set in on the Formats tab.
- Pickup Early Window
- The maximum amount of time before the Req time that clients can be picked up. Values are defined based on the Time span property set in on the Formats tab.
- Pickup Late Window
- The maximum amount of time after the Req time that clients can be picked up. Values are defined based on the Time span property set in on the Formats tab.
- Dropoff Early Window
- The maximum amount of time before the Req time that clients can be dropped off. Values are defined based on the Time span property set in on the Formats tab.
- Dropoff Late Window
- The maximum amount of time after the Req time that clients can be dropped off. Values are defined based on the Time span property set in on the Formats tab.
- Forbidden Uris
- Navitia-compliant aspects of journeys that should not be included in trip results. For example, specific networks or physical modes. Multiple values can be used (separated by commas).
-
On the Profile tab, navigate to .
-
Set up ancillary data:
-
Click .
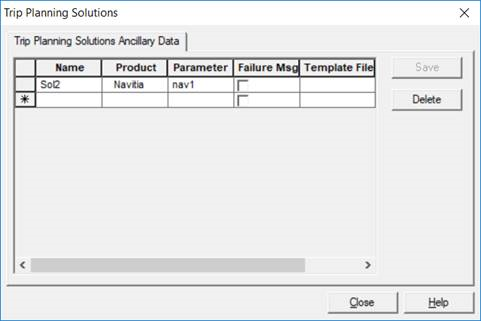
-
Click .
-
Associate the created solution for Trapeze personal trip planning:
- Click .
- Click the Solutions tab.
-
Modify the visible data using the Name column by
selecting the Solution Name created in Trip Planning Solutions ancillary
data.
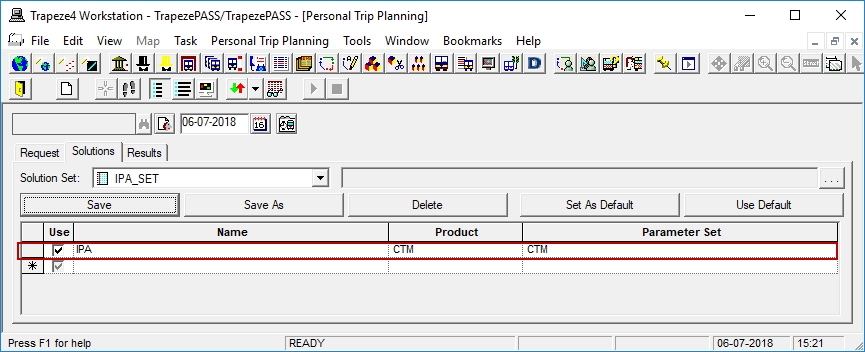
-
Click Save As.
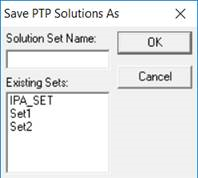
- Type a Solution Set Name for the modified version.
- Click OK.
-
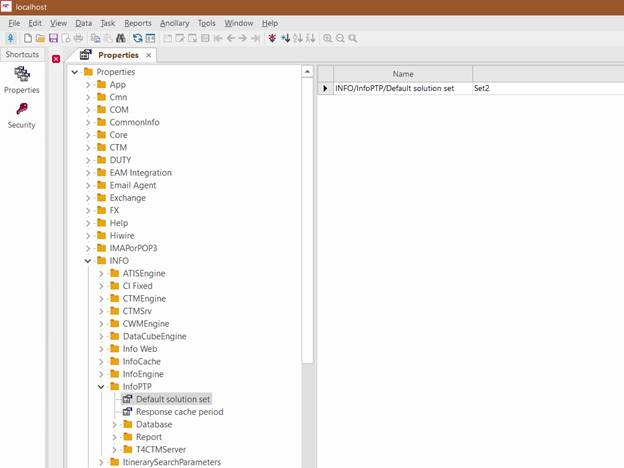
Define Trapeze6 properties for the Navitia trip planner:
-
Navigate to .
-
Navigate to .
-
Set the appropriate switches:
-
In the Boolean Switch frame, click
ON.
The switch is enabled. Enable = 1.
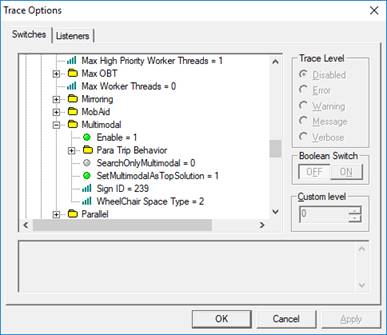
-
In the Boolean Switch frame, click
ON.
-
Search for and save a solution using the Schedule Booking Wizard.
The following are required:
- In the MOT list, Fixed must be selected (as well as your typically selected options).
- The Trip must have a requested (RT) time.
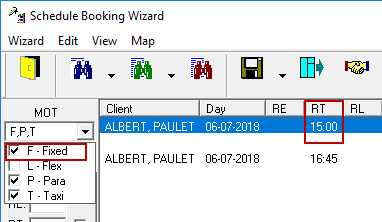
A trip is scheduled for the fixed route.If no solutions appear, try turning off violations. (A violation may be causing Schedule Booking Wizard to return no options.)