Drawing Pattern Traces Freehand
You can add the pattern trace on the Google Map using the Freehand option.
-
Click or on the main toolbar, click the Route Definition
button:

-
On the main toolbar, click the System Map
button:
 The map window appears on the right section of the screen. The system map is shown by default.
 -
Click the Google Map button:
 The system map is replaced with the Google Map.
 -
Click the Patterns tab and select the pattern you want.
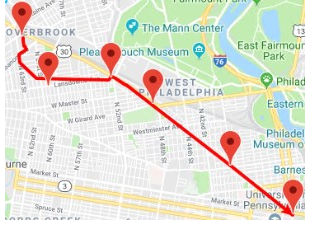
A set of placemarks representing the points on the pattern is shown on the map.
-
On the screen toolbar, click the Edit button:
 The Edit dialog box appears.
 - On the Plot tab, click the Freehand option in the Connect Along frame.
- Optional:
To center the pattern on the map, click the
Center button:

- Click Begin Plotting.
- On the Google Map, click the first point that you want to add to the trace.
-
Continue clicking the points that you want to add.
The Crosshair icon appears as you click a point.
-
On the map, click the Snap button to snap the trace on to the
map.
The trace is adjusted to follow the route more closely.
-
On the Plot tab, click Save Trace.
The Road API under your Google Map API key must be activated for the maps functionality to work. Contact your System Administrator to make sure that it has been configured.