Place text in quotation marks for exact match search results.
Importing Runs and Roster Data
You can use Importing Runs and Roster to import scheduling data into Trapeze
OPS.
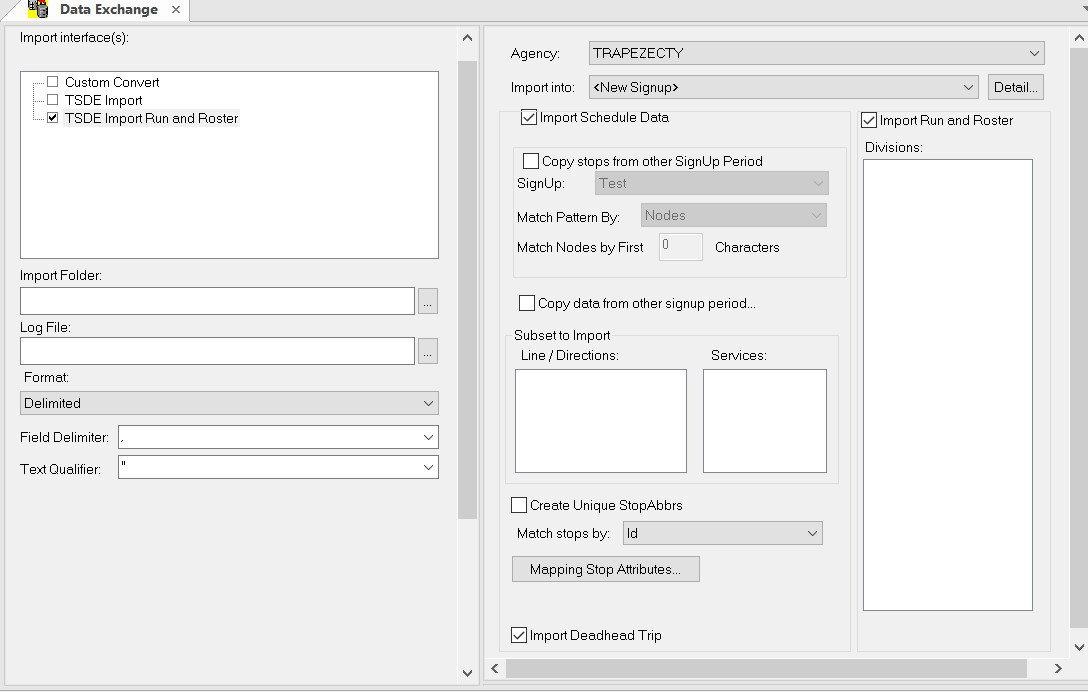
In the Import interface(s) pane, select TSDE Import
Run and Roster.
The TSDE Import Run and Roster screen shows almost all the fields in the TSDE
Import screen with additional options:
In the left pane, click the ellipsis button beside the Import Folder field.
The Browse for Folder dialog box appears.
Select the folder containing the files created in the export process, and then click
OK.
The Subset to Import fields in the right pane are filled in with the
lines, directions, services, and divisions data contained in the selected
files.
Click the ellipsis button beside the Log File field.
The Browse for Files and Folders dialog box
appears.
Create a log file for the import process.
The path to the file is displayed.
In the Format drop-down list, select the appropriate format:
Delimited, Fixed Width, or XML.
If you selected Delimited, the
Delimiter and Text Qualifier fields are
activated.
Perform one of the following steps:
In the Field Delimiter drop-down list, select the symbol to
distinguish the fields. for example, select comma (,) if the data is delimited by
commas.
In the Text Qualifier drop-down list, select the appropriate
mark. The double quotation marks () is recommended.
On the right pane, select the agency to be imported from the
Agency list.
In the Import into drop-down list, select <New Signup> for
the sign-up period to which you want to import. If you are re-importing the data, select
the appropriate sign-up period.
Select the following options:
Import Schedule Data - If selected, the lines, stops,
services, and divisions data is imported.
Import Run and Roster - If selected, the runs and rosters
contained in the selected Import folder. Import Deadhead Trip - If selected, deadheads
in the source data are imported and saved as trips in the destination folder.
Click the Execute Interfaces button.
The Summary dialog box appears.
Check the information and click OK.
After the import is completed, a message box appears stating how long the
process was completed.
Click OK.
We recommend running the FX Data Integrity Check Tool on the destination database
after importing data into a new sign-up period.
 The Summary dialog box appears.