Configuring CTM Server in a TpNet.ini Environment
CTM Server processes itinerary searches while the Schedule Server is used for the automated generation of live and template schedules.
Procedure
-
Change the computer name of the CTM Server to an easily identifiable name.
For example, the site name.
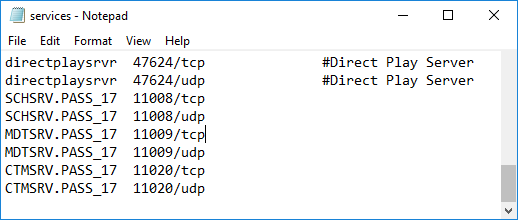
- Open the services file on the CTM Server (located in the C:\Windows\System32\drivers\etc directory).
-
Add the following two lines:
whereCTMSRV.name port/TCP CTMSRV.name port/UDP- name is the newly defined CTM Server logical name
- port is any port number that is not already in use on the
system.
For example, 11002.
-
In the TpNet.ini file on the CTM server and each workstation, add
the following line:
whereCTMSRV.name IPaddress port TCP- name is the newly defined CTM Server logical name
- IPaddress is the IP Address of the CTM Server (for example, 195.5.10.133)
- port is the port number used in the previous step

- Launch the Trapeze4 Workstation.
-
Click .
The Properties dialog box appears.
- On the System tab, click .
-
Click Select.
The Open dialog box appears.
-
In the Look in list, click the TpNet.ini
file in the Bin folder, and then click
Open.
The file appears in the TpNet Address File text box.
- On the Profile tab, expand CTM Server, and then click Network Address.
-
In the Network Address text box, type the name of the CTM
Server.
For example, CTMSRV.name.
- Click OK.
- Click to close the Trapeze4 Workstation.