Adding Constraint Rules
Constraints are added as ancillary data and applied to selected sign-up periods and divisions.
All of the conditions that take more than one value after a singular keyword can be considered as logical OR, that is, a Boolean function, which is true only if at least one of the values match.
If the keyword is plural, then the condition is considered as logical AND, that is, Boolean function, which is true only if all of the values match.
Some condition rules allow for the opposite of the condition. In these cases, type “not_” prior to the keyword, for example, not_def.
-
Click .
The Constraint Parametersscreen appears.
-
Press F3.
The Context dialog appears.
- Select the appropriate sign-up period.
- Click OK.
-
Perform one of the following steps:
- Click .
- Click the Add New button:

The Global Constraint Details dialog appears.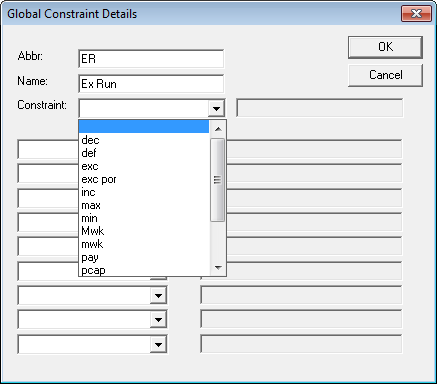
- In the Abbr field, type the abbreviation for the constraint.
- In the Name field, type the name of the constraint.
- In the Constraint drop-down list, select a keyword. (For more information on the keywords, contact your Trapeze representative.)
-
In the blank field beside the Constraint field, type or select a
value that you want to apply to the selected constraint.
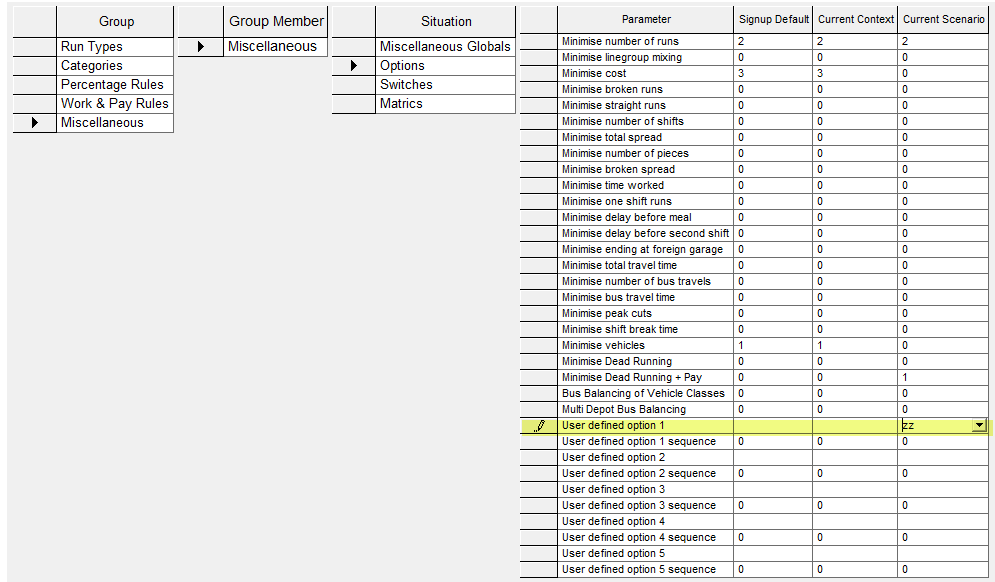
For Soft constraints, the value must be a single character (any alpha character). The constraints appear as user-defined options under in the Block Optimizer Parameters tab as shown in the following sample graphic.
- (If applicable) To add Condition Rules, click a field in the left column and from the drop-down list, click the keyword of the condition rule you want to apply. For example, you may want to add exceptions when a constraint does not apply.
- In the blank field beside the selected keyword, type an appropriate value.
- Click OK.
The constraints are held in a separate file and attached to run types as required. This allows for local agreements as applied to specific schedules (for example, inclusion of maximum work time on a route or not being able to mix routes).