Creating Buffers with a User-Defined Point

You can create buffers around a selected point on the map.

  1. On the system map, zoom in on the area that you want to work on.
  2. Press CTRL and click a point on the map.
    A shaded circle appears on the spot you clicked.
  3. Click Analysis > Setup.
    The PLAN Options dialog box appears. The selected point is shown on the Buffers tab as a User Point type. It is automatically named by its closest street coordinates.
  4. To define other attributes of the new buffer:
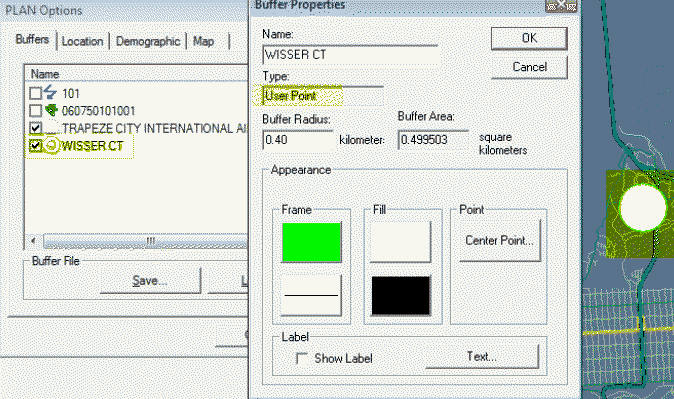
    1. Select the new point and in the Existing frame, click Properties....
      The Buffer Properties dialog box appears.
      PLAN Options and Buffer Properties dialog boxes
    2. Change the values shown by default, if necessary.
    3. Click OK.
  5. In the PLAN Options dialog box, click OK.