Defining Generate Report Jobs
(Requires EZ-Wallet) EZ-Wallet reports can be automatically generated using Schedule Job Agent.
Before you begin
Procedure
-
Select a job from the grid.
The scheduled job record settings are shown in the Job Schedule frame.
-
Confirm the Agent Name
PassScheduleAgent is defined for the job schedule.
The selected agent determines the options that are available in the Job Type field.
-
Click Job Data.
The Job Data dialog box appears.
-
In the Job Type field, select Generate
Reports.
If no Job Types are available, confirm that an Agent Name has been selected in the Job Schedule frame of the Schedule Job Agent dialog box.
-
Click New.
The New Batch dialog box appears.
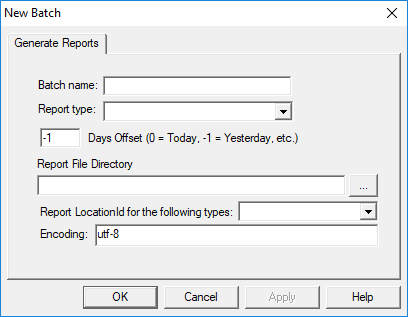
- Type the Batch Name for the job step.
-
Select a Report type:
- EZWallet Sales Extract
- Customers Para Purse Balances Extract
- Traffic Usage Extract
- In the Days Offset field, type the number of days from today to run the selected reports.
- Use the ellipsis button to define the Report File Directory where the generated reports should be saved.
-
Define the Report LocationId for the following types.
These are the EZ-Wallet POS locations from which extract data should be reported.
-
Type the Encoding to be used for the report.
Typically, UTF-8 is used.
Other options include ISO-8859-1, ISO-8859-1, or UTF-16.
- Click OK.
-
Click OK.
The Job Data dialog box closes.
- Click Save.