Adding BlockBuster Extensions to Menus
The contents of the menus are referred to as extensions, which can potentially extend the scope of the product.
The following modules are automatically added when BlockBuster is installed: Main50.tpx, Report50.tpx, BlockBuster50.tpx, GRuncutting50.tpx, TpxBusGraph50.tpx, and Sdd50.tpx as shown on the Modules tab of the Extensions dialog. Your Trapeze representative may have placed these extensions on the menu bar, however, you may need to alter some settings from time to time.
-
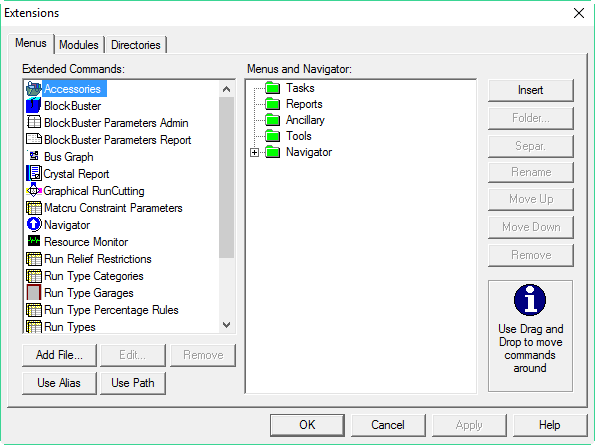
On the main menu, click .
The Extensions dialog opens with the Menus tab open. The Extended Commands pane shows the commands that you can add to the folders in the Menus and Navigator pane. The folders represent the options on the menu bar.
-
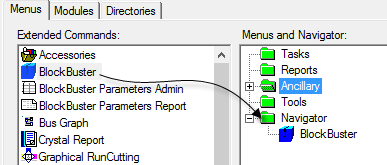
Click and drag the commands to the folder where you want them to appear on the menu.
For example, click the BlockBuster command and drag it to the
Navigator folder:
 To select more than one extension at a time, press and hold the CTRL key as you click the extensions you want to drag to the same folder.
 -
Perform the following steps as applicable:
- To rearrange the options within a folder or subfolder, select the item you want to reposition and click Move Up or Move Down as appropriate.
- To group some items together, you can add separators between items. Select an extension and click Separ. A line appears above the selected extension.
- Click OK.