Adding Sign-Up Periods
Sign-up periods define the length of time over which a schedule applies. These are often seasonal.
-
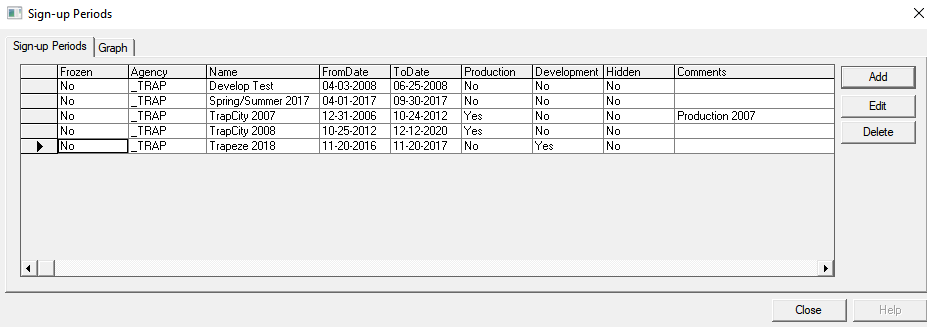
Click . The Sign-up Periods opens.
-
Click Add. The Add opens.
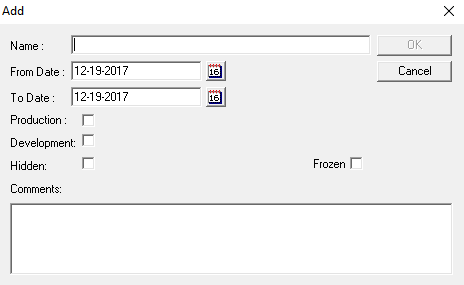
- In the Name field, type a name for the period.
-
To set the date range, perform one of the following steps:
- In the From Date and To Date fields, type the values to create the date range of the period.
- Click the calendar icon beside the date field and select the date that you want from the calendar.
You can sort sign-up periods by the date fields. - Optional:
Select the appropriate option as applicable:
- To set the period as production (streetable), select the Production checkbox. This is important for other products such as Trapeze INFO-Agent where the system needs to know the span of dates to retrieve data appropriately.
-
To set the period as development, select the Development checkbox.
- To hide the sign-up period from being displayed in the Sign-up period list when users set the context, select the Hidden checkbox.
- To freeze the sign-up period when you do not want changes made to it, select the Frozen checkbox. (If selected, the grid in the Route Definition screen become read-only and most of the menu options in the shortcut menus of the different tabs will also appear shaded or not activated.)
- Optional: In the Comments field, type the information you want to add about the sign-up period.
- Click OK.
- In the Sign-Up Periods , click Close.