You can enter check data performed at a specific point.
Ensure that you have defined the correct sign-up period in
the Set Mode dialog box: (Click or press F3.)
-
In the Ridership Analysis screen, set the
Trips tab to point check mode.
-
On the Trips tab, select a trip that has been
extracted.
-
Do one of the following steps:
The
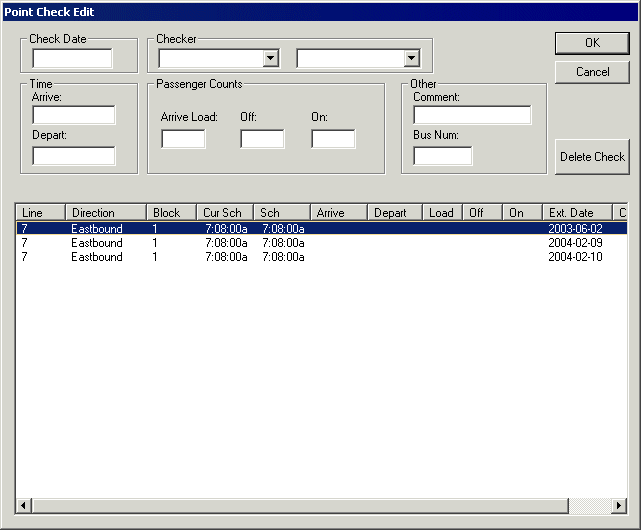
Point Check Edit dialog box appears. It lists
all the point check extractions (checked or not) for the trip.
-
Select the appropriate extraction from the grid on the lower section of the
dialog box.
-
In the Check Date field, type the date of the trip you
want.
- Optional:
In the Checker frame, select the employee type and checker
in the Checker drop-down list.
-
In the Time frame, type the time that the vehicle arrived
at the selected point in the Arrive field.
-
In the Depart field, type the time that the vehicle left
the selected point.
-
In the Passenger Counts frame, type the number of
passengers on the vehicle when it arrived at the stop in the Arrive
Load field.
-
In the Off field, type the number of passengers who
alighted the vehicle.
-
In the On field, type the number of passengers who
boarded the vehicle at the selected point.
- Optional:
In the Other frame, type a comment in the
Comment field.
-
In the Bus Num field, type the vehicle number.
-
Click OK.
A message appears asking if you want to save and exit data
entry.
-
Click Yes.
The new data appears on the Trips tab.
-
Select another trip and repeat the procedure until all the check data for the
point is typed.