Running the Trapeze6 Service Shell as a Windows Service Method 1
You can install the Service Shell as a Windows service that runs automatically when you start the computer.
About this task
Procedure
-
In the [drive:][path]\Bin\vc12\Win32\Release folder,
where path is the directory where Trapeze6 is installed,
double-click TpSCM.exe.
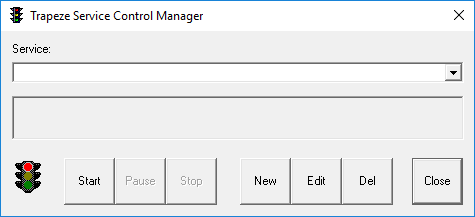
The Trapeze Service Control Manager dialog box appears.
-
Click New.
The Add New Service dialog box appears.
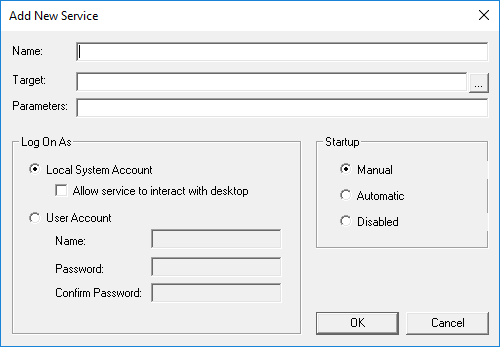
- Type a Name for the service.
-
Beside the Target field, click the ellipsis (…) button .
The Open dialog box appears.
-
Navigate to the [drive:][path]\Bin\vc12\Win32\Release
folder, where path is the directory where Trapeze6 is installed,
click SrvShell.exe, and click Open.
The SrvShell.exe path and file name appear in the Target field.
- In the Log On As frame, select Local System Account.
- In the Startup frame, select Automatic.
-
In the Parameters field, type:
-config profileName.profile -id=Server where:
- profileName
- is the name of the profile that you want to use.
- Server
- is the server specified in the profile (that is, Primary or Secondary).
- Click OK.
- In the Trapeze6 Service Control Manager dialog box, click Start.
-
Click Close.
In Windows Administrative Tools, the service appears with the name you typed and is prefixed with Trapeze. For example, Trapeze service name).