Place text in quotation marks for exact match search results.
Adding Supplementary Fields
You can add supplementary fields to most of the main screens using the
Supplementary Data Manager.
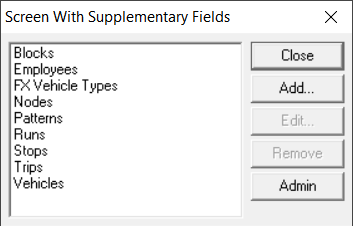
Click Tools > Supp. Data Definition.
The Screen with Supplementary Fields dialog box
appears.
Note: The Admin button is only accessible to the system
administrator.
Optional: Select an item for which you want to create supplementary
fields.
Click Add or double-click the selected item.
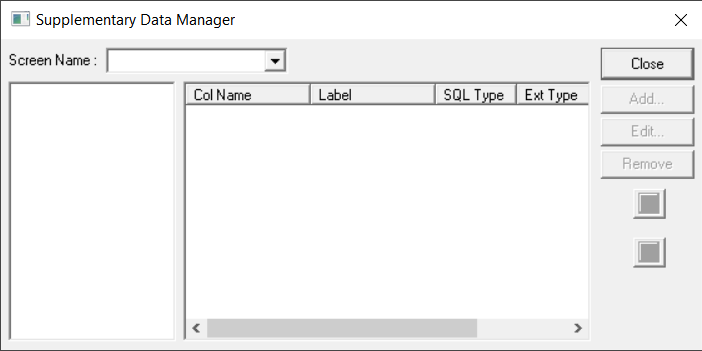
The Supplementary Data Manager dialog box appears. (You can
re-size the dialog box.)
In the Screen Name list, select the item you want.
On the Supplementary Data Manager dialog box, select a field in
the left frame. Click Add.
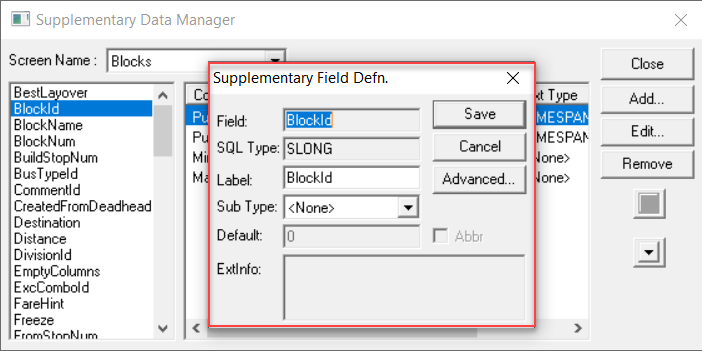
The Supplementary Field Defn. dialog box appears.
In some situations, the Field and SQL
Type (field data type) fields appear shaded.
Perform any of the following steps:
In the Field field, overwrite the name of the field.
In the SQL Type field, replace the SQL type of the new field.
To change the value in the Label field, overwrite it with the
name that you want.
The new name appears as the column header of the associated
data when displayed on screen. When you work on the supplementary field again, it
appears as the value by default.
The field displays the label from the dbd file.
If there is no label, the field automatically takes the value from the
Field text box.
In the Subtype list, select the appropriate sub-type for the
field. For example, for time-related fields Sub-Type such as Report Time, select Time
or Time Format. Your selection appears in the Ext Type column of the Supplementary
Data Manager dialog box.
In the Default field, type the format of the sub-type you
selected. For example, if you chose the Time sub-type for Report Time, type “0:00”.
You can leave the Default field blank. The system assigns
a value where applicable, for example, for Time, it assigns 12:00a if you are using
the APX time format.
Note: This field is only enabled for fields marked Write. See
step 8.
Optional: In the ExtInfo text box, type
additional information if necessary.
Optional: Click Advanced. The
Advanced Options frame appears at the bottom of the dialog box.
Apply any of the following options:
Write: Allows you to edit a supplementary field. When
updating supplementary fields, only “writable” data (data that is marked Write) is
updated. You can also set the default for this field. For supplementary fields that
are not marked Write, the Default field is not enabled.
Hide: Allows you to hide a supplementary field.
Required: Allows you to create mandatory supplementary
fields.
Click Save. You are returned to the Supplementary Data
Manager dialog box.
Optional: To change the display order of the fields in the Supplementary Data
Manager dialog box, click the Up and Down (arrow) buttons below
Remove. If you click the first set of data on the list, the up
arrow changes into a square box. If you click the last set of data on the list, the down
arrow changes into a square box.
Optional: To remove a field, select the field and click Remove.
A message box appears asking you to confirm the delete action.
Click Yes.
The field goes back to the list in the left frame. It is not deleted from the
database.
 Note: The Admin button is only accessible to the system administrator.