Importing Data from Another Datasource
Importing data refers to opening the files of one system or application in the format of another system or application and saving or using it in the latter system or application.
The Import Data command enables you to:
- Copy all column types including binary, varbinary, and longvarchar including longvarchar data up to two gigabytes in length.
- Show progress information for each table copy including a status bar, total number of rows to copy, total rows copied so far, and the auto-selected maximum transaction size (displayed as: ROWS COPIED / TOTAL ROWS [ts = MAX ROWS PER TRANSACTION]).
- Automatically select the transaction size based on an estimate of the optimal maximum transaction size for the type of DBMS being used, divided by the maximum size of each record in the table being copied. If possible, the entire table is copied in one big transaction. If the table is too big to copy efficiently within one transaction, the copy is broken into multiple smaller transactions equal to one tenth the size of the calculated maximum transaction size.
- Transform null data into non-null data, if necessary. Null data refers to values that may be stored in the database to represent missing, not applicable, or undefined values. When copying data, null data is converted into non-null values set as the default on any column that does not allow null values in the destination. For example, if a column is part of a primary key in the destination but not in the source, and if there is null data in that column in the source, DBEdit replaces the null data with values in the destination (0 for numeric, “” for string, and –1 for time fields) by default. This allows the primary key to be created on the destination table.
-
Click .
Available data import options are based on the selected database definition file.If you are not currently connected to a data source, you will be prompted to connect now. (This is the destination data source.) Select the data source and, when prompted, choose any required administrative options.
If you are already connected to a data source, the Import Data dialog box appears.
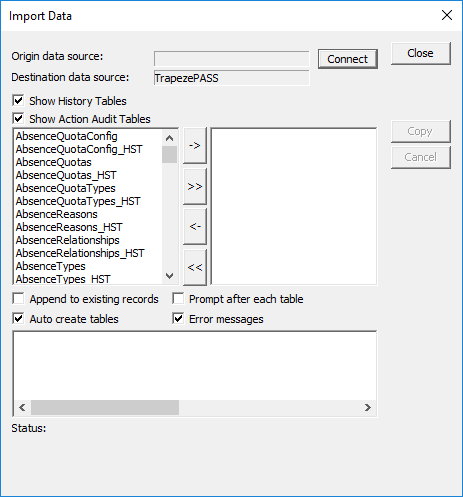 Note: DBEdit drops existing tables prior to creation. If you work with Oracle databases, you must change the Tablespace DBO that is set as the default prior to importing. Select the Append to existing records check box if you do not want the tables to be dropped. The imported records are added to the records already in the table.