Editing Geocodes of Stop Clusters
On the Details tab of the Itinerary Planning screen, the system uses the coordinates of the designated bus stops within the stop clusters when determining walking instructions. It does the same when generating origin/destination walking instructions in the Distance Wizard.
The designated bus stops are considered the “geometrical center” or “centroid” of the stop cluster. In some cases, it may be necessary to change the “centroid” of the stop cluster. For example, the centroid of a stop cluster at a bus bay may generate walking instructions that have the clients walking on the road or elsewhere unsafe. For practical purposes, the centroid must be moved nearer the front door of the bus station.
- Open the Stop Cluster tab.
-
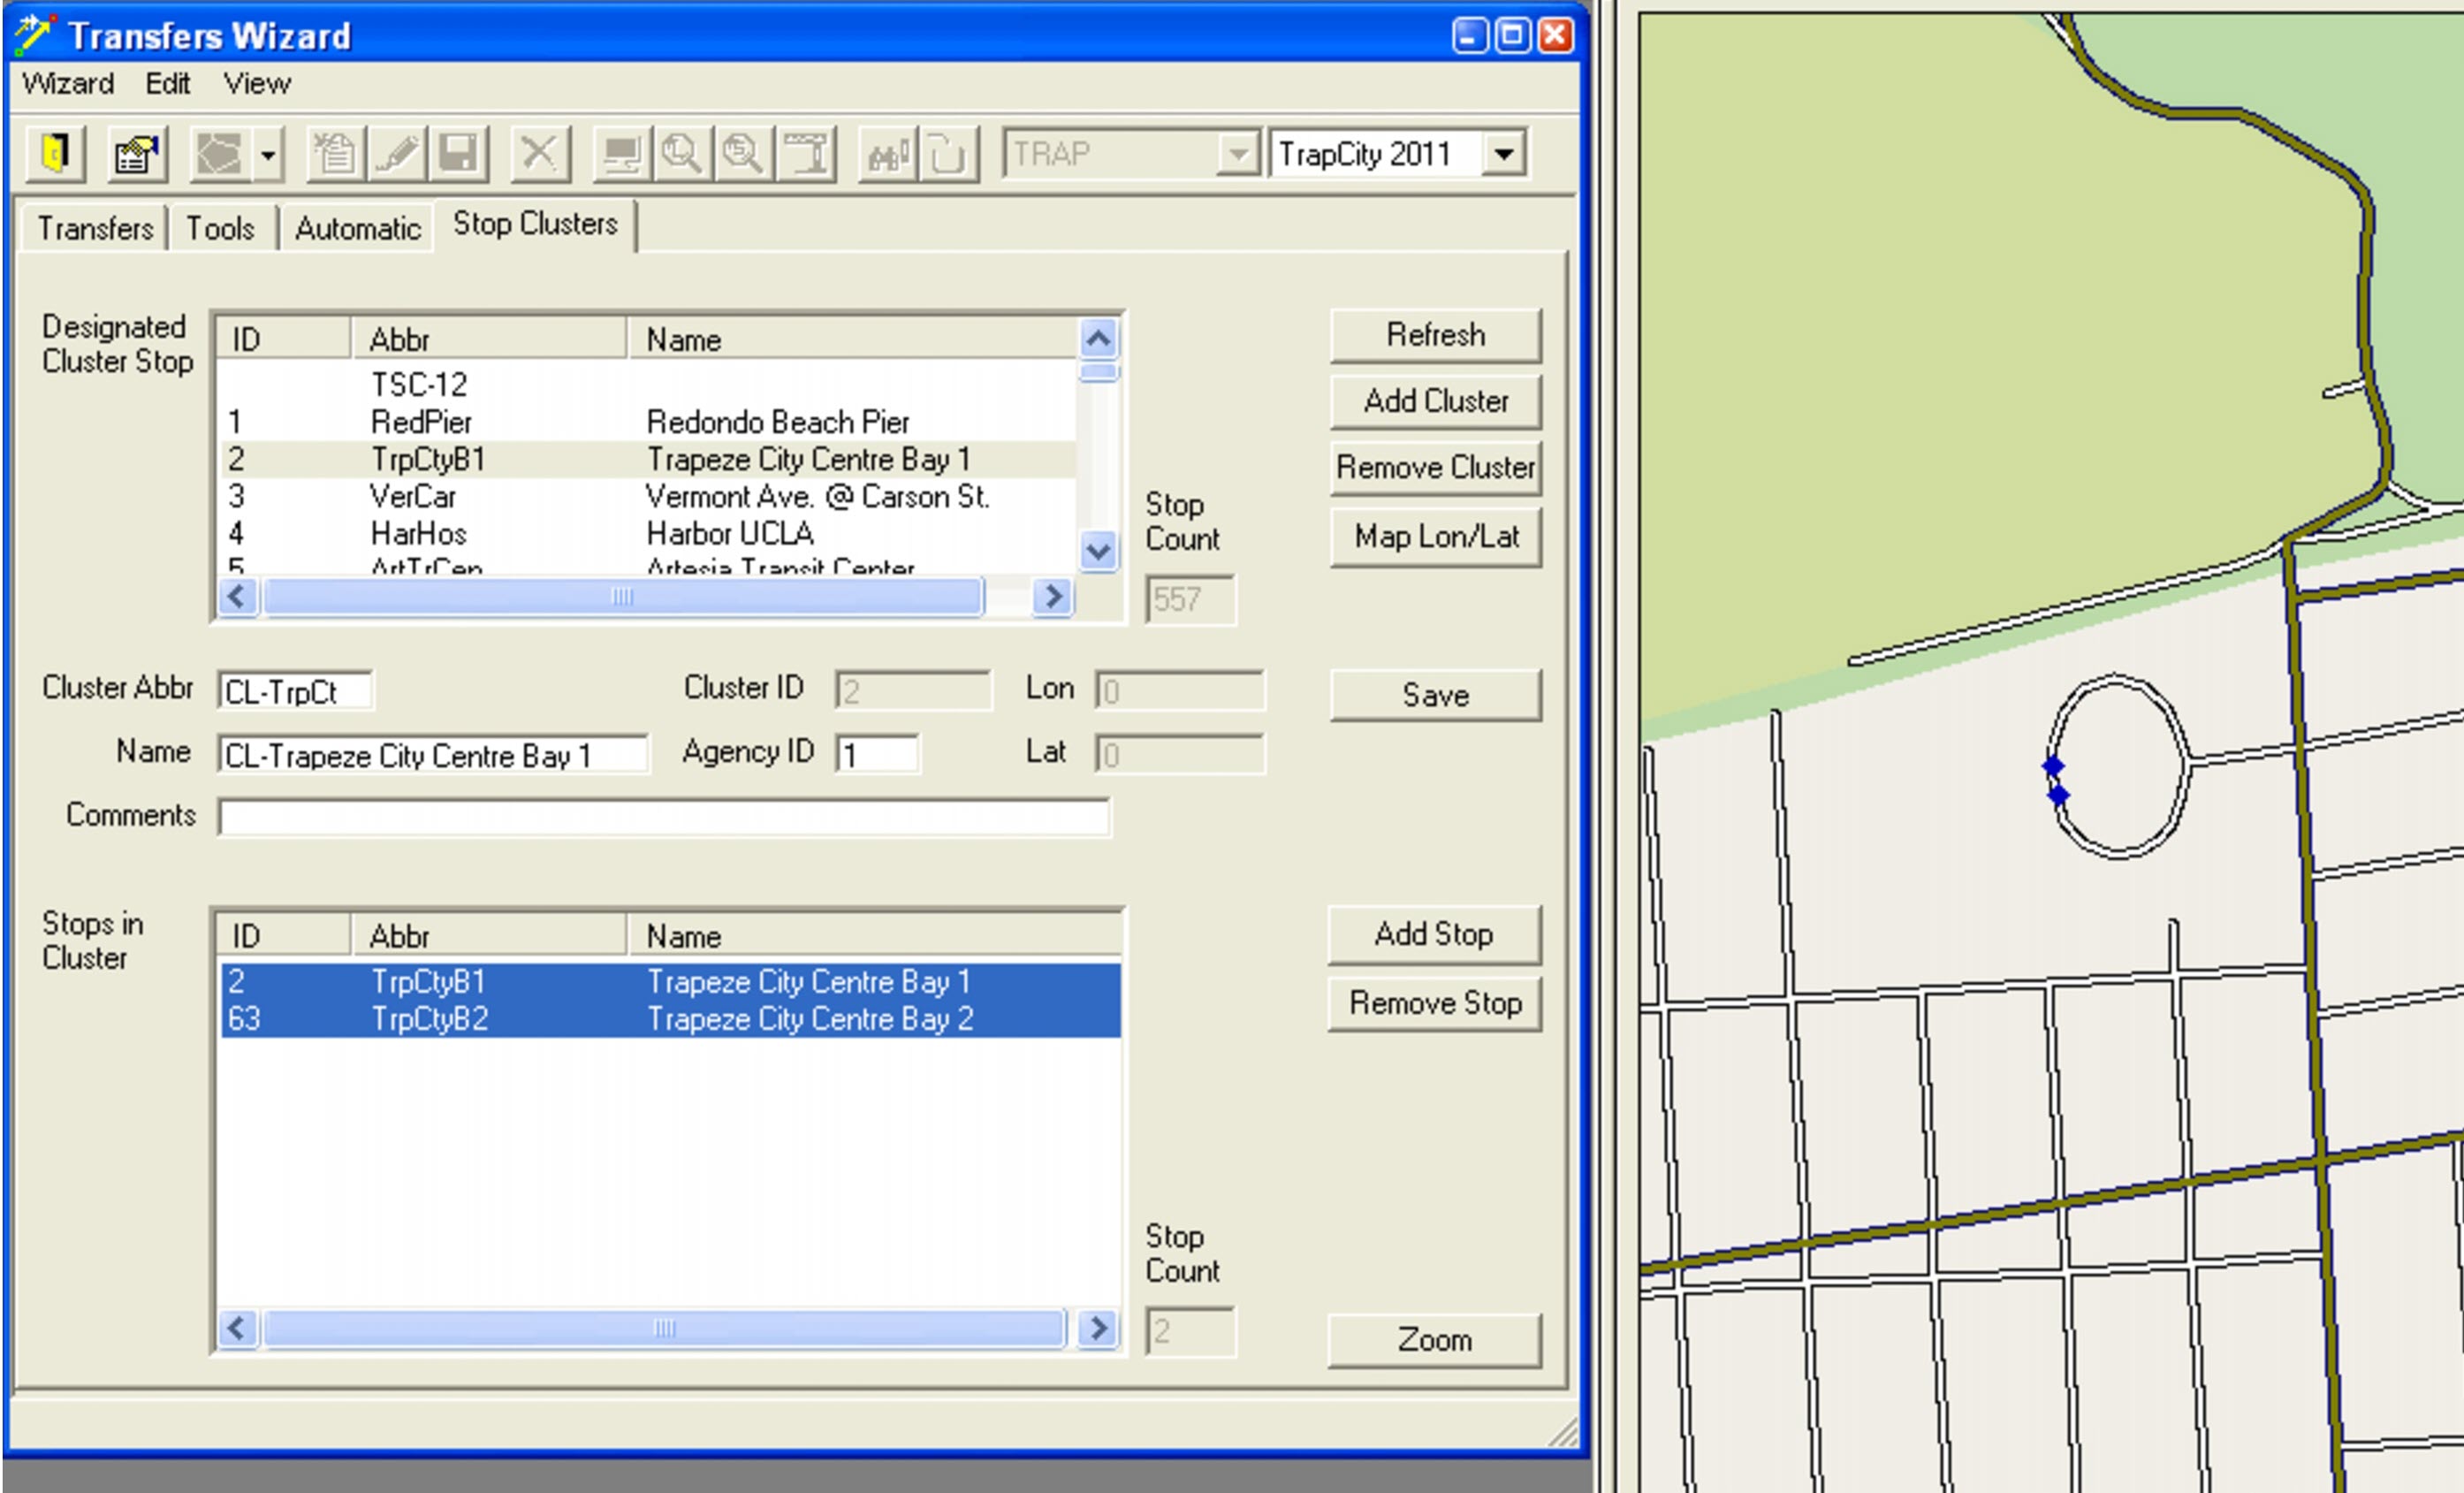
In the Designated Stop Cluster pane, select a stop cluster.
The stops of the cluster are shown in the Stops in Cluster pane.
-
Click Map Lon/Lat.
The system displays the location of the stop cluster on the map. The blue markers represent the stops in the cluster.
-
On the map, click the spot that you want to be considered as the “centroid” of the stop cluster.
The Lon and Lat fields are populated with the coordinates of the selected area.
- Optional:
To change the location of the “centroid”, click elsewhere within
the stop cluster or edit the coordinates in the Lon and
Lat fields.
The centroid is represented by a red marker.

- Optional: In the Comments field, type additional walking instructions as appropriate.
-
Click the Save button:
