Automatically Loading Live Schedules
Set Schedule Server to automatically load and unload live schedules.
Before you begin
About this task
Because trips can be scheduled only on loaded schedules, some future schedules (in addition to the schedule for the present day) should be loaded in the system. After the first live schedule and the number of consecutive future schedules to be loaded is defined, the Schedule Server maintains this window of time, which is called a schedule range. The Schedule Server loads one future schedule for every past schedule it unloads on a daily basis.
For example, the window begins on the current day. If the current day is December 1 then, including the current schedule, the window consists of 14 consecutive days with the last loaded schedule being December 14. Tomorrow, the range of loaded schedule will span from December 2 to December 15.
The Schedule Server automatically unloads any schedule outside of the schedule load list, including any schedule that has been loaded manually or a past schedule outside of the range loaded. To see when the Schedule Server unloads a schedule, click . This feature is set at eight-hour intervals by default and Schedule Server unloads a schedule if it has not been altered for eight hours.
Procedure
-
Click .
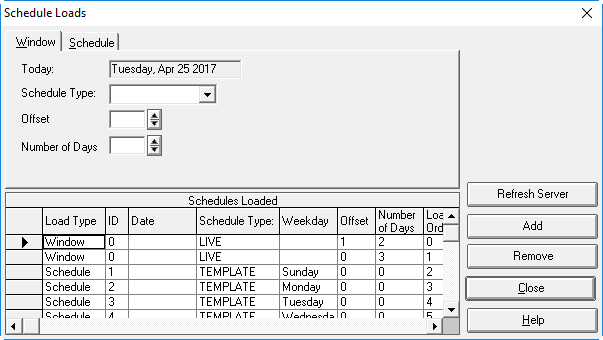
The Schedule Loads dialog box appears.
-
Click the Window tab.
The grid shows all schedules loaded into the system. The load type window shows the window set for automatic loading.
- In the Schedule Type field, choose Live.
-
In the Offset field, type the offset from the present
date.
The present date appears in the Today field. The Offset value determines the first schedule to be loaded in your window. For example, if you type 0, the first schedule to be loaded is for today's date; if you type 1, the first schedule loaded is for tomorrow's date; and if you type -1, the first schedule loaded is for yesterday's date.You can use the up and down arrows on the right to adjust the offset number.
- In the Number of Days field, type the total number of schedules you want loaded for your window. For example, 9.
-
Click Add.
A new Window load type appears in the Schedules Loaded list.
- Optional:
In the Load Order cell of your new entry, type a number to
determine the order that the schedule window is to be loaded.
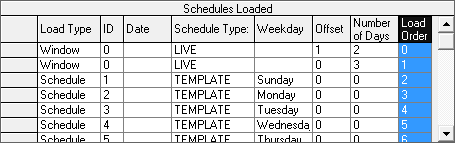
Typing 1 sets the Schedule Server to load your window first. Live schedules should always be loaded first so that when the Schedule Server is restarted, all work (reservations, scheduling, and so on) can resume immediately. -
Click Refresh Server.
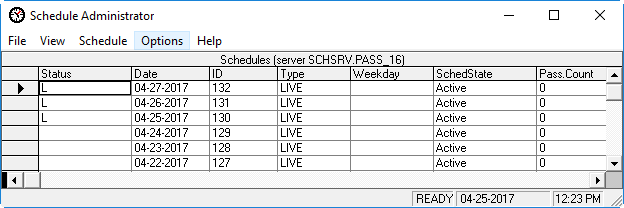
The system is refreshed and your changes are shown in the Schedule Administrator grid.
-
Click Close.
The Schedule Loads dialog box disappears.
Results