Creating Schedule Types
Define schedule types available to Trapeze4 Workstation users.
About this task
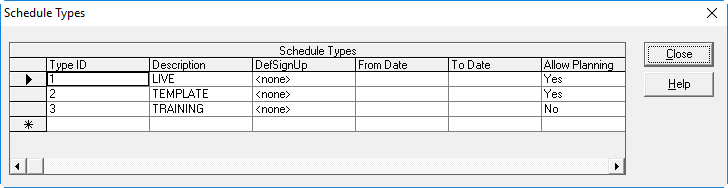
The DefSignUp column is for Fixed Route and Flex services only and is used to define the period of time that the schedule is to be in effect.
Procedure
-
Click .
The Schedule Types dialog box appears.
-
In the Description field, type a name for the new schedule type.
For example, Training.
In the From Date and To Date columns, click the appropriate dates in their respective lists. Typically, these selections should be left blank. Do not type a date range unless instructed to do so by your Trapeze Customer Care representative.
-
In the Allow Planning column, click an option in the list.
Planning Mode allows users to make changes to runs without scheduled time restrictions.
-
- Yes
- Users can work with the schedule type in Planning Mode.
Only users granted the correct permissions will be able to use Planning Mode in the Trapeze4 Workstation.
-
- No
- Planning Mode is unavailable for the schedule type.
Planning Mode should be allowed only for the template schedule type. However, you might not have to enable Planning Mode for any schedule type. -
-
Click the next row to save the schedule type.
In the Schedule Types grid, the new type is added to the list and a type ID is assigned to it.Schedule types are active if they meet one of the following criteria:
- FromDate is not set and ToDate is a later date than today’s date.
- Today’s date is between FromDate and ToDate.
- ToDate is not set and FromDate is an earlier date than today’s date.
- Neither FromDate nor ToDate is set.
- Click Close.