Adding Ancillary Data
Adding new records for the different types of ancillary data follows a typical set of steps. :
-
Click Settings, and then click Config in
the Admin list.
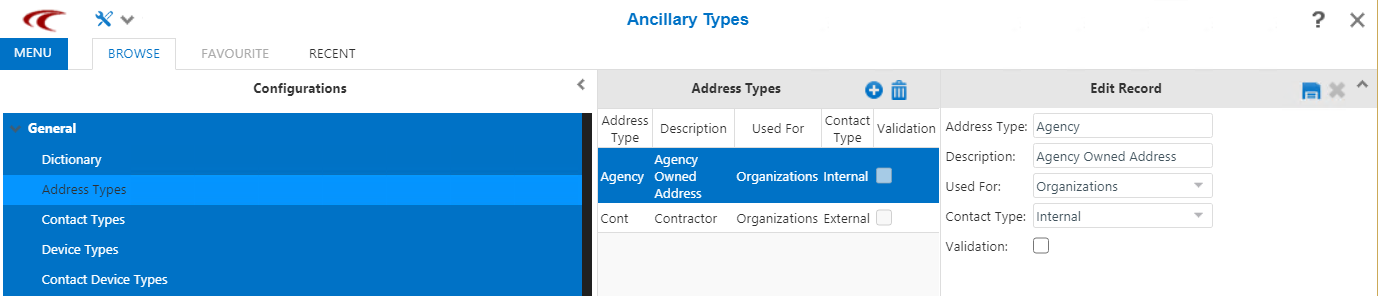
The Ancillary Types screen appears.

-
In the Agency drop-down list, click the appropriate
agency.
The data and the screen toolbar may not be enabled if no agency is selected.
-
In the Configurations pane, click the type of ancillary data you
want to add.
The grid displays the previously added records of the selected ancillary data type and the Edit Record pane shows details of the highlighted record.
- Required:
In some screens, in the list that appears on the upper right corner of the right pane,
select the appropriate option, for example, in the BSM EDI ancillary data types list,
select the EDI Point Type before adding a record in the middle
pane.
The records associated with the selected option are shown in the middle pane.
-
Click the New button:
 .
The Add Record pane replaces the Edit Record pane. The following sample graphic shows the Add Record fields for Address Types.
.
The Add Record pane replaces the Edit Record pane. The following sample graphic shows the Add Record fields for Address Types.
- In the fields shown, enter or select the appropriate values.
-
Click the Save button:
 .
Note: When saving a new ancillary data type, you are unable to see the Update button unless you are in the Master (M) screen mode. If you are in the Locked (L) mode, you are only able to view the screen. If you are in the Tablet (T) mode, you are only able to edit points that you have signed out.
.
Note: When saving a new ancillary data type, you are unable to see the Update button unless you are in the Master (M) screen mode. If you are in the Locked (L) mode, you are only able to view the screen. If you are in the Tablet (T) mode, you are only able to edit points that you have signed out.