Shifting Reliefs
The Shift Reliefs function is used to show you the results and costs of shifting the time at a relief point on a run. It is used in manual runcutting only.
The Shift Reliefs pane, which opens on the right section of the screen, allows you to see how a block is cut, that is, the runs that have been cut from the block and to shift any piece in the block.
The grid on the upper right section of the pane shows the selected run in the block.
The Run frame shows the data of the selected run. There may be two frames depending on the number of pieces in the run, for example, a 2-piece run. If the relief point is on the street, the data on the run prior to the selected run appears in the upper Run frame.
In the Reliefs frame, the list of the relief nodes in the run are shown. The relief point on the selected run is highlighted by default. The relief nodes above this point belong to the first run while those below belong to the second run. If the relief is at a garage, it is highlighted and is first on the list.
In the Totals frame, the Pay and Efficiency values are shown. The Legal check box is selected if the runs are legal. It is not selected if both run pieces or the uncut pieces do not have valid run types and run numbers or have violations.
- Frozen runs - If you select frozen runs, you will not be able to shift their relief times; the Apply button will not be enabled.
If your transit property uses floating or moving reliefs, the reliefs are displayed with an ‘at sign’ (@). The values of these reliefs are based on what you have set for the , Moving Relief Offset Start, and Moving Relief Offset End parameters.
- In the Cut Pieces pane, click the run with the relief point you want to shift.
-
On the footer, click Shift Reliefs:

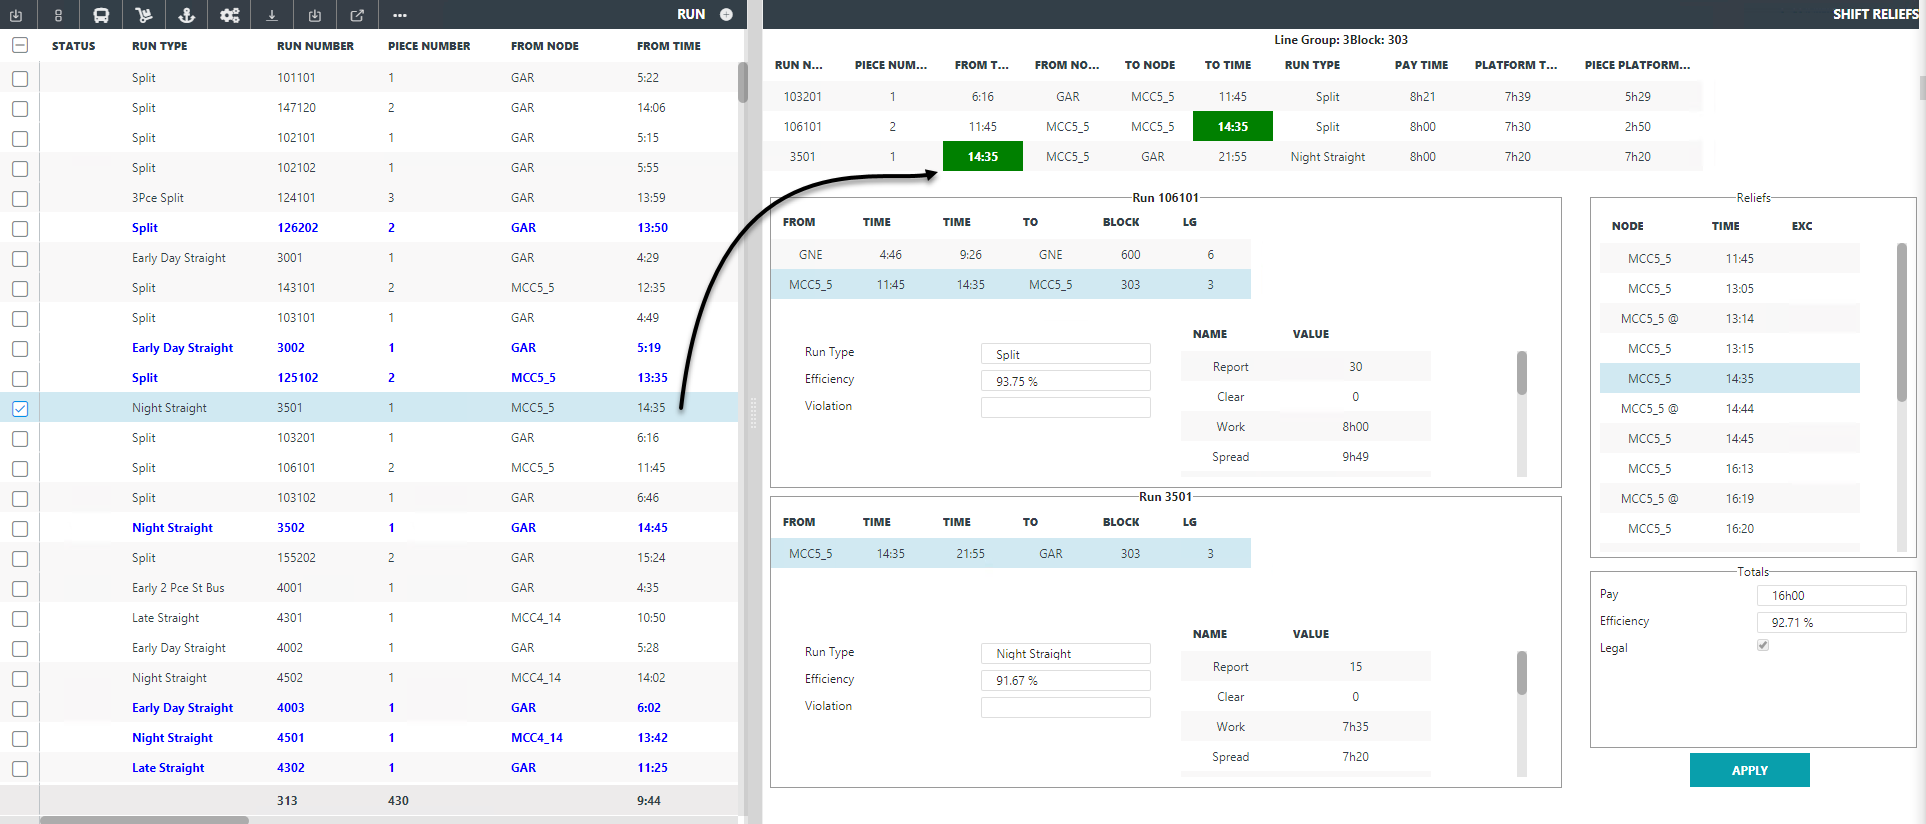
The Shift Reliefs pane is shown on the right section of the screen. The data of the selected run appears in the Reliefs frame.
-
In the Reliefs frame, click the highlighted node (the
node in the selected run) and move it to the node to which you want to shift the
relief.
As you select different relief times and locations, the data on the times, pay, efficiency, and other related values change automatically in the Runs frames on the left section of the pane.
- Optional:
(For floating or moving reliefs) Click the relief with the 'at sign' (@) symbol
that you want to adjust and click the Time field beside
it. In the drop-down list, click the new time you want to apply.
The selected time is shown on the Run frames in the Shift Reliefs pane.
- Review each set of data until you find the most acceptable solution.
-
Click Apply.
The Shift Reliefs pane is closed.