Using the Graphical Runcutting Tool

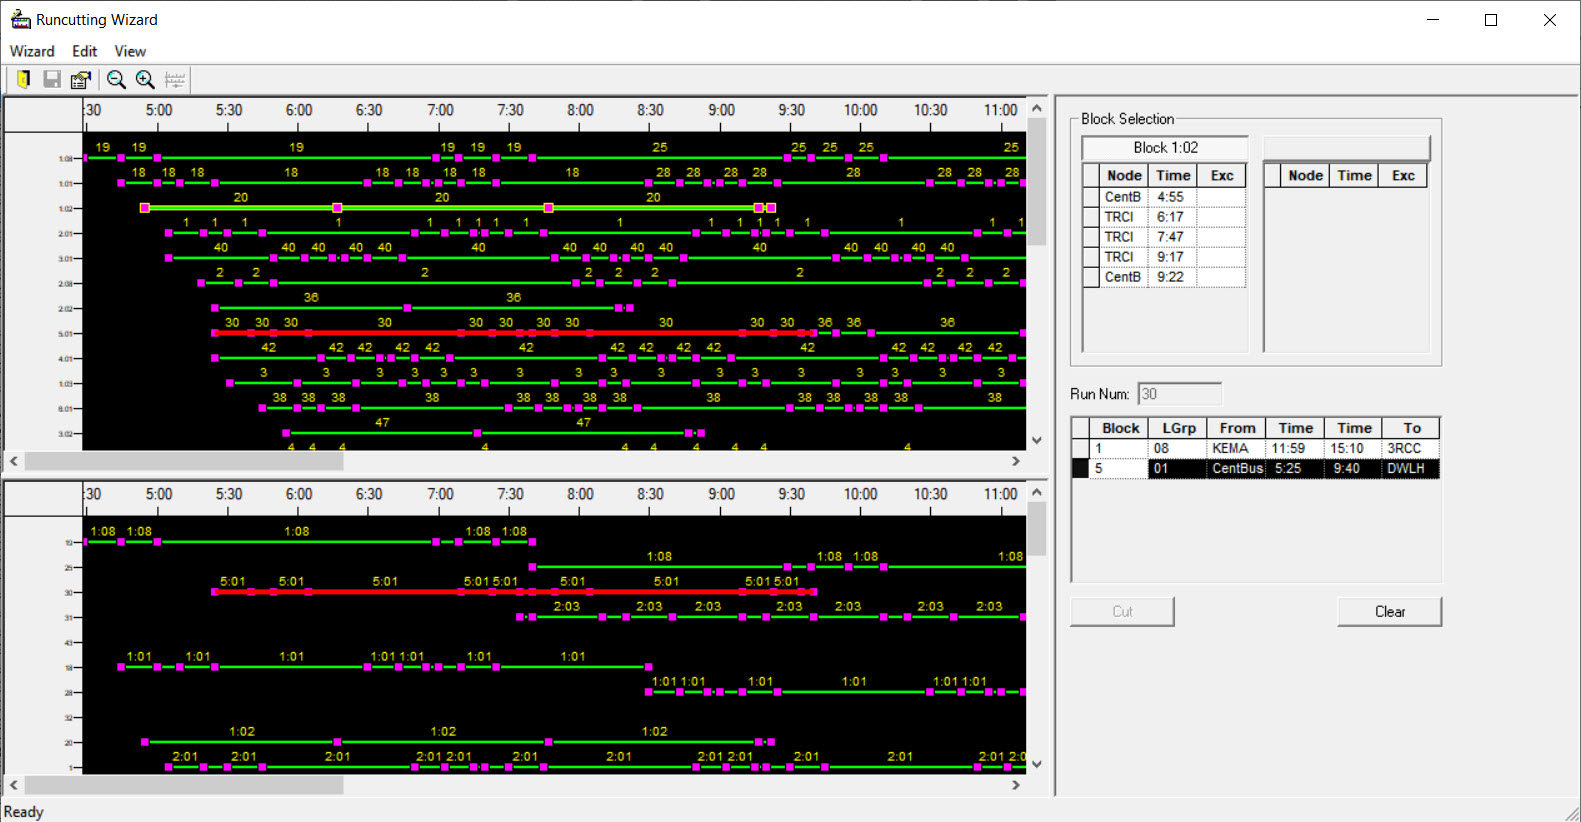
The Graphical Runcutting tool allows you to perform runcutting with the use of graphical representation of the blocks.

Using the Graphical Runcutting tool is similar to manual runcutting. Before runcutting, be sure to have updated your relief events and assigned garages to the blocks. The Runcutting Wizard (Graphical Runcutting tool) dialog box will be empty if you have not completed the Blocking process.
Tip: To help you see the results of your graphical runcutting, display the graphs of your Cut and Uncut Pieces grids on the Runcutting screen. From the Runs tab in the Runcutting screen, click Runcutting > View Options > Graphs
  1. Click Tools > FX Tools > Graphical Runcutting.
    The Runcutting Wizard screen appears.
  2. Optional: To change the properties of the graphical display on your screen, click Wizard > Properties or click Properties: Properties button.
    The Properties dialog box allows you to change the colors of the graphic display.
  3. Change the color of the items you want.
  4. Click Apply.
  5. Click OK.
  6. To view the relief details of a block, double-click the line of the block.
    The details appear in the grids in the Block Selection frame.
  7. To see the details of another block, perform these steps:
    1. Click the bar above the right grid.
    2. Double-click the other block line.
      The relief nodes and times associated with it appear on the right grid of the Block Selection frame.
      Runcutting Wizard dialog box
  8. Click the start of the piece you want to cut.
    A down arrow appears over the square where you clicked.
  9. Scroll to the point where you want to end the piece.
    The piece changes color and remains in the upper-left graph. The cut piece also appears in the lower-left grid in the same color. The details of the cut piece appear in the lower-right grid.
  10. Click Cut.
  11. To cut the rest of the uncut block pieces, repeat steps 8 to 10.
  12. Optional: To undo any runcuts, select the run you want and click Clear.
  13. To save your runs:
    • Click Wizard > Save Runs
    • Press CTRL + S.
    The Save Runs dialog box appears. It shows a summary of the runs you have created.
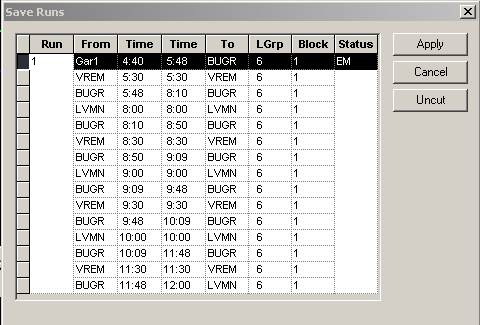
    Save Runs dialog box
  14. Perform any of the following steps as required:
    • To show the runs in the Cut Pieces grid of the Runcutting screen, click Apply.
    • To cancel applying the saved runs, click Cancel.
    • To undo the runcuts, select the runs you want and click Uncut.
  15. Click Wizard > Exit or click Close on the upper-right corner of the dialog box: Close button.