Place text in quotation marks for exact match search results.
Understanding the Blocking Screen
You can link a series of trips to form blocks using the Blocking
screen.
Before opening the Blocking screen, select
the appropriate Sign-up period, Line Group,
Service Group, and if applicable, set the Exception
Combo off or select an applicable exception combination in the Set
Mode dialog box.
To display the Blocking screen, do one of the following
steps:
Click Task > Blocking.
Click the Blocking button: .
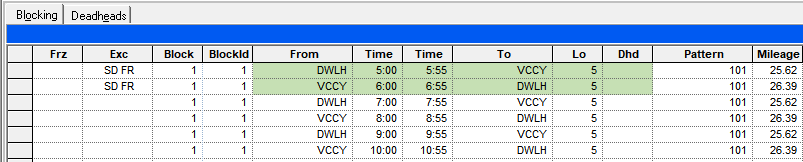
The Blocking screen contains two tabs:
Blocking and Deadheads. It opens with the
Blocking tab by default.
If exceptions are applied on trips, the rows are in color as shown in the following
example:
Optional: To view columns that are not within view on the screen, click the horizontal scroll
bar.
Only the columns that display times now move to the left or right depending on how the
scroll bar is dragged. If you scroll to the right, the columns on the left remain static
while the node columns, starting with the first node appear to slide under the static
columns as the hidden columns are displayed.
Optional: To move up and down the grids, use the arrow keys.
To access Blocking features that are not in the Edit dialog box, click
Blocking on the main menu.
If the Blocking screen has been set to Read-Only in the FX
Security tool, the options on the Blocking menu that allow users to
edit records will not be activated, that is, they will appear shaded. (Contact your
system administrator about the setting of Security levels in the FX Security tool.)
Note: You can copy and paste sections of the grid into an Excel spreadsheet.
 .
. If exceptions are applied on trips, the rows are in color as shown in the following example: