Performing Data Integrity Checks
The following procedure lists the basic steps in performing data integrity checks.
-
Click .
The FX Data Integrity Check dialog box appears.
-
Do one of the following:
- Click the button of the scheduling process you have completed.
The system automatically marks the panes and items associated with the process you clicked. For example, if you have just completed building trips, click Blocking to make sure that your trips data is complete and valid before creating blocks. The Trips and Deadheads panes are marked and enabled.
- Select the check box of the option you want to check, for example,
Blocks.The options in the pane below the selected check box are activated as shown in the following graphic.
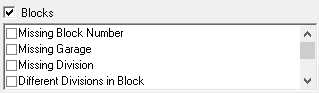
Select the items on the pane that you want to check. You can select as many categories and items as you want to check. - Click the button of the scheduling process you have completed.
- Required:
(If also using Trapeze OPS) To ensure that FX data is correctly prepared for Trapeze
OPS, click Ops.
The fields that are associated with OPS data creation are automatically selected.
-
Click Start.
If there are data errors, a message box appears asking you to check the file for details.
- Click OK.
- Optional:
Perform any of the following steps as required:
- To view errors, click View File.
A list of the data errors appears in a text editor. If there are no errors found for the services you selected, the word None appears on the report. Print the file to a printer of your choice or save the file. You can also copy and paste sections of the reports into an Excel spreadsheet.
-
To refresh the dialog box in order to perform another data check, click Clear.
To return to your current context, click Get Context.
-
To save the filters you selected to check for data integrity, click Save Custom. The options on the lower right section of the dialog box are cleared and a box appears under the Exc. Combo combo box.
The name of the first saved configuration on the list is highlighted by default. You can overwrite the name with the name of your new set of selected options, and then click Save Custom again.
- To display the list of saved configurations, click Custom. A list of previously saved configurations appears on the lower-right section of the dialog box. Select the configuration whose filters you want to apply. The filters are automatically selected in the FX Data Integrity Tools dialog box.
- To view errors, click View File.
- Click Close.