Converting Custom Data
The Custom Convert feature is applied when data created in a third party application must be converted into XML files before they can be imported into a Trapeze application.
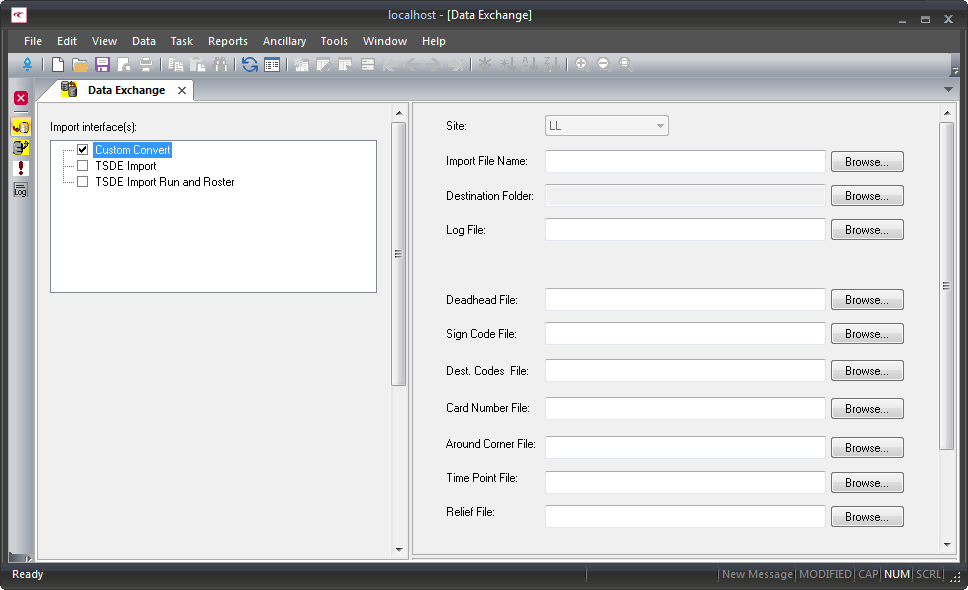
- In the Import interface(s) frame, select Custom Convert. The function that translates the client data into XML files is typically listed below the Custom Convert option.
-
Select the agency's name and additional fields are shown on the right pane.
The following graphic shows examples of the additional fields that are displayed. The Site field shows the abbreviation of the agency name.
-
Click the Browse button beside the Import File Name
field.
The file directory containing client data appears.
-
Select a client file type, and then click Open.
The file appears in the Import File Name field.
-
Click the Browse button beside the Destination
Folder field. In the Browse for Folder dialog,
select the folder where the XML files will be stored, and then click
OK.
The pathname of the selected folder appears in the Destination Folder field.
-
Click the Browse button beside the Log
File field. In the Log File dialog, select a log
file where the custom function will record the conversion process, and then click
Open.
The pathname of the selected file appears in the Log File field.
- Click the Browse button beside the file that you want to convert. For example, click the Browse button beside the Deadhead File. In the file directory, select the file, and then click OK.
-
After selecting the files that you want to export into XML files, click the
Execute Interface button:
 Summary message box is displayed.
 - Verify the information displayed and click OK.
- Optional:
If necessary, change the selections that you made in the previous steps.
A message confirms that the conversion is completed.
- Click OK.