Place text in quotation marks for exact match search results.
Creating Email Templates
The Setting feature in the Correspondence dialog box allows you to create and edit
email templates, for example, for acknowledgments of feedback received, requests to review
feedback or the status of feedback action.
In the screen toolbar, click the Form Letter button:
The Correspondence dialog box appears.
Click Setting.
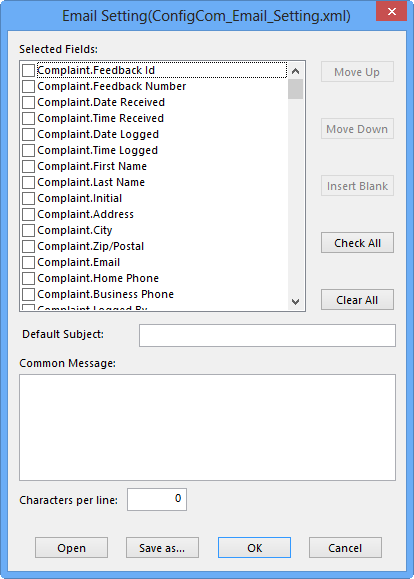
The Email Setting (ConfigCom_Email_Setting.xml) dialog box
opens.
In the Selected Fields list, select the fields that you want to
add to the template.
To add all fields, click Check All.
To arrange the selected fields in the manner that you want them to appear on the email message:
Click the field that you want to move and click Move Up or
Move Down.
Click the field where you want to insert a space and click Insert
Blank. A marked check box and space are inserted after the selected
field.
In the Default Subject field, type a subject line that will
automatically appear in the Subject field of the email message.
In the Common Message field, type the text that may be often included in your messages, for example, a statement acknowledging receipt of a letter or report.
In the Characters per line field, type the number of characters
that you want displayed per line of the email message.
Optional: Select the Add Subject Attachments check box to add attachments
to the templates.
Click OK. The selected fields and content that you have previously defined are shown in the Preview pane.
Make changes to the content, if necessary.
The COM > Email and Formletter > Allow user to modify Email context property must be activated to allow editing of the email
message.
To save the template, click Save As.
In the directory, browse to the folder where you want to save the template.
Type a file name.
The file is saved with an xml extension, for example, SettingFiles.xml.