Creating Patterns (for Nodes)
A node pattern defines the variation of nodes to be used to build a trip of a particular line. On the Edit tab in the Patterns Edit dialog box, all the nodes for the line are highlighted in the Select Nodes frame by default.
-
On the Patterns tab, click or click Edit:
 The Patterns Edit dialog box opens.
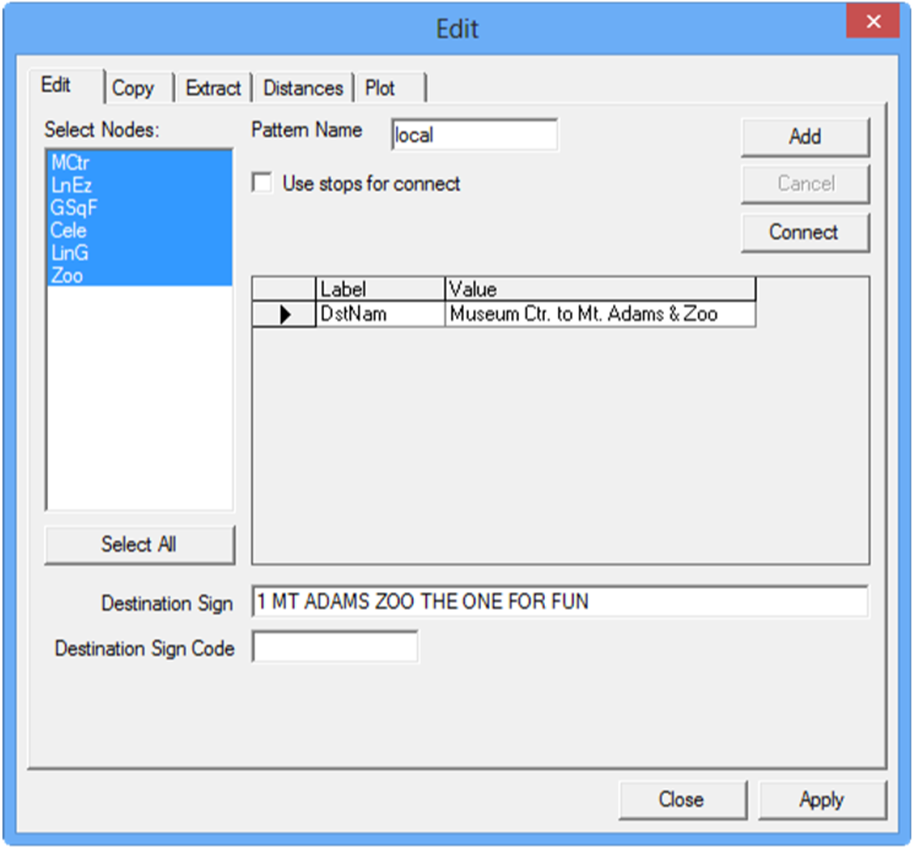
-
Click Add.
The list of nodes of the line you are working on appear in the Select Nodes frame.
- From the Select Nodes list, select the nodes that you want to use for the new pattern. Be sure to start the pattern with a node not a stop.
- Optional: To use all the nodes for this pattern, click Select All.
- In the Pattern Name field, type a name for the pattern using your site’s naming convention.
- Optional:
Perform any of the following steps to complete the fields:
- To create a best guess pattern trace that displays the shortest possible distance between the start and end of the trace, click Connect. The pattern trace appears on the system map.
-
To ensure a more accurate guess, select the Use stops for connect check box.
- In the Destination Sign field, type a short description of the pattern, for example, line number and main street used by the route. (This piece of information can be used in customer information systems, for example, bus signage.)
-
In the Destination Sign Code field, type the code for the destination or headsign. (This field is used with TransitMaster applications.)
- Click Apply.
- Click Close.