Setting Buffers Using Fixed Routes
You can select geographic areas for analysis by creating buffers around fixed routes.
-
In the Spatial Analysis screen, do one of the following
steps:
- Click .
- Click the Setup button:

The PLAN Options dialog box appears.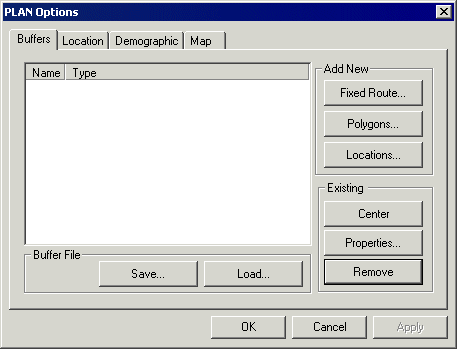
-
Select a specific route or multiple routes.
The following graphic shows the pattern and stops of the route within a specific direction:
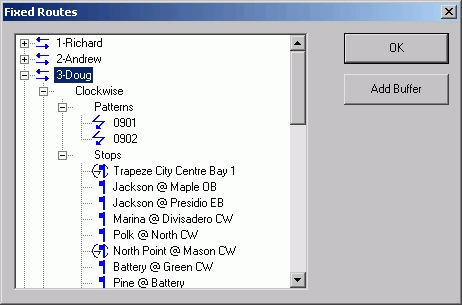
The fixed routes for the current sign-up period as well as their associated stops, timing points, and patterns by direction are displayed in a tree view. If a route name has a plus (+) sign beside it, click the plus sign to display the elements that are associated with that route. Any element in the tree that has a corresponding icon and is displayed on the map can be a basis for a buffer. A stop with a click icon indicates that it is a time point as well. Fixed routes and patterns are line traces and stops are point locations. Since routes contain direction, patterns, and stops attributes, you can choose an entire route depending on your analysis needs.
-
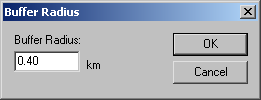
Click the route, pattern, or stop to create a buffer and then click Add
Buffer.
The Buffer Radius dialog box appears.
-
In the Fixed Routes dialog box, click
OK.
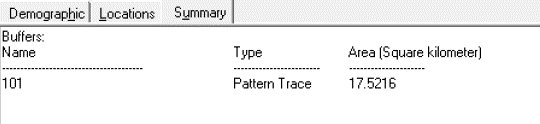
The new buffer is added to the list on the Buffers tab of the PLAN Options dialog box. The following graphic shows the Summary tab, which provides some information on the new buffer: