Creating Apps from Workspaces

After reports and dashboards have been created, they can be published as apps to be used by power users and consumers.

Only power users with Member-level or Admin-level access can publish apps.
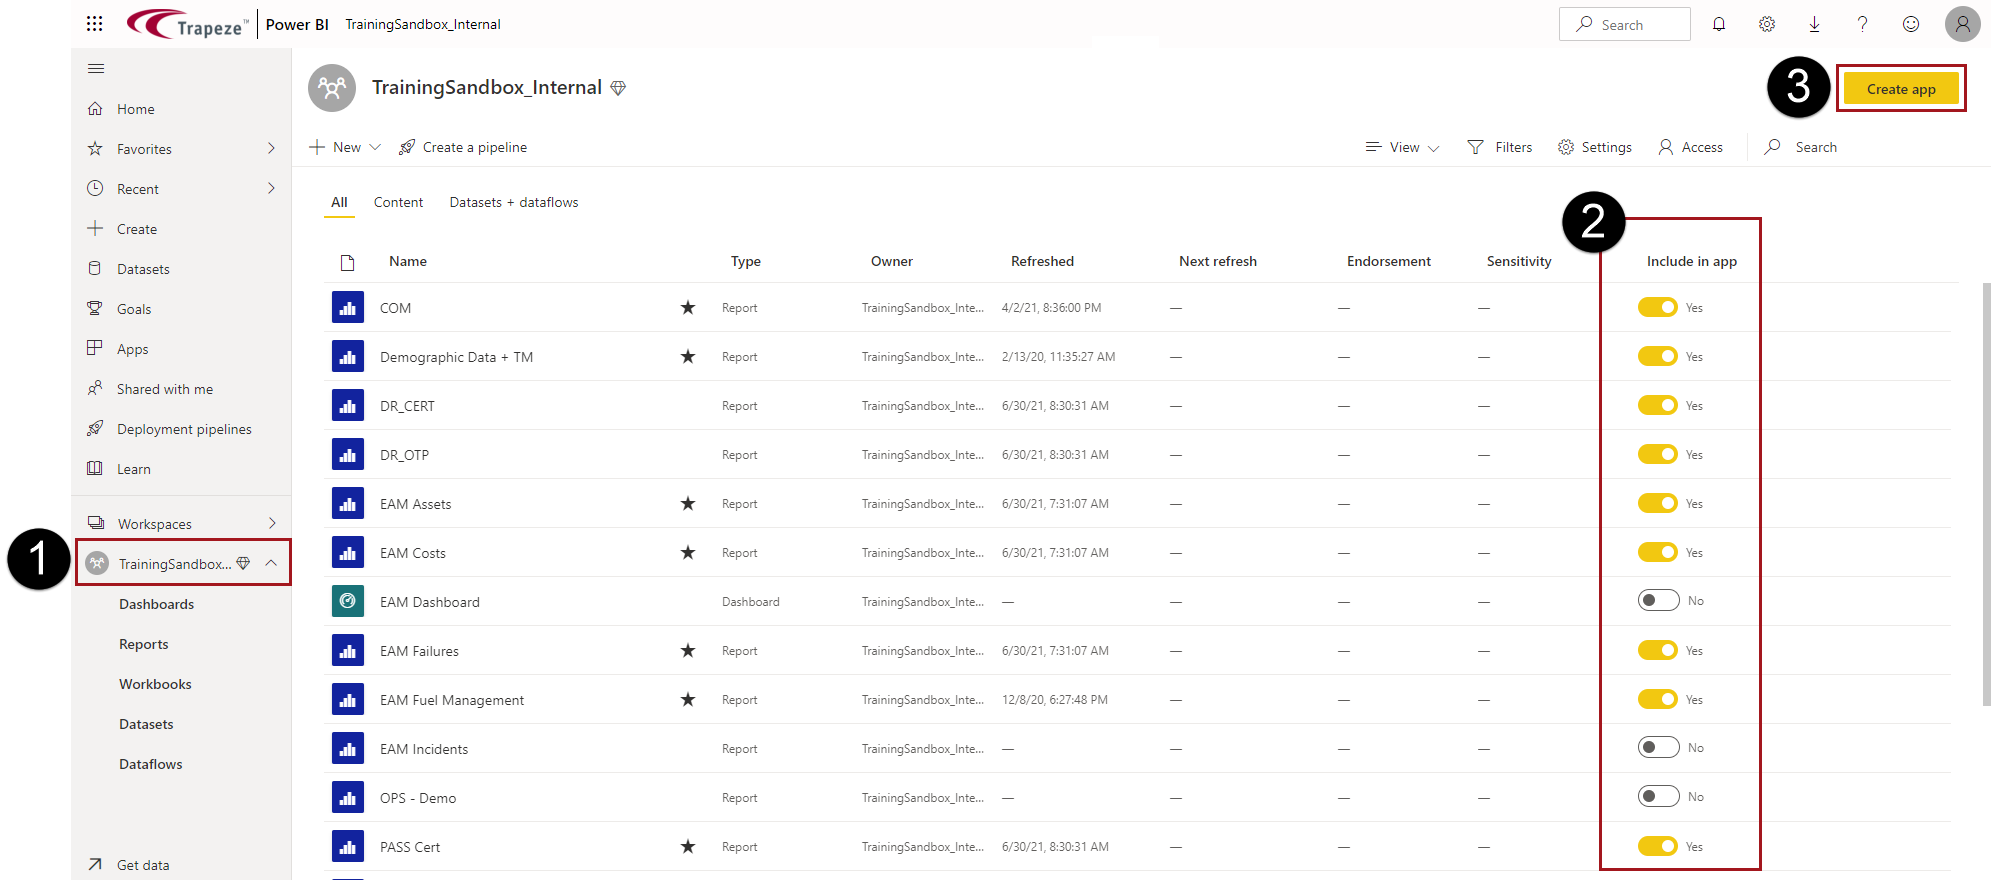
  1. Open the workspace from which you want to use content for the new app.
    Workspaces are allowed one associated app.
  2. In the Include in app column, set the toggle switch for each report or dashboard in the workspace.
  3. Select Create app.
    The Workspace area showing the workspace name in the navigation pane circled in red with a number 1, the Include in app list circled in red with a number 2 and the Create app button circled in red with a number 3.
  4. On the Setup tab, do the following:
    1. Enter an App name and Description.
    2. Enter a Support site URL.
    3. Upload an App logo.
    4. Select an App theme color.
    5. Select the Contact Information to be shown and add any required contact details.
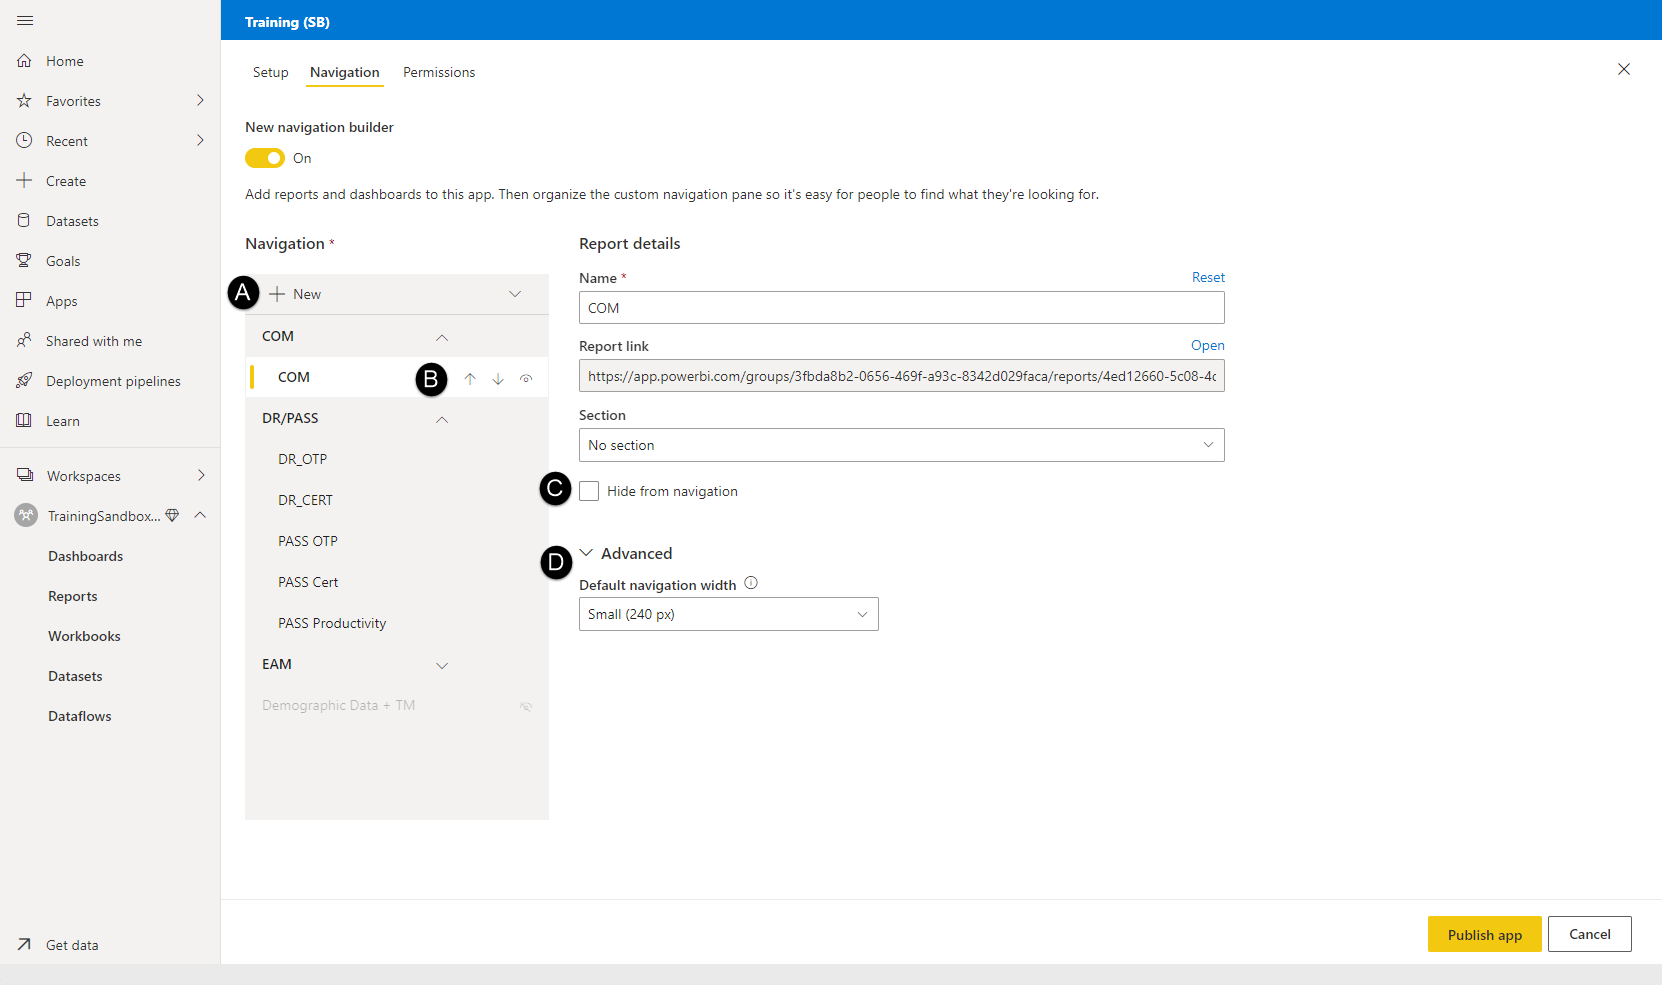
  5. On the Navigation tab, do one or more of the following:
    When you create a new app, the New navigation builder toggle is set to On. Reports and dashboards that were marked to Include in app are shown in the Navigation area.

    The Navigation tab showing +New marked with A, the report move and hide options marked with B, the Hide from navigation option marked with C and the Advanced options marked with D.
    1. Select + New > Section to create categories for reports and dashboards. Enter a new section Name.
    2. Use the Move up, Move down, and Hide options to update the Navigation order.
      When moving navigation items up and down, look closely at where they fall in the hierarchy. Items will need to be moved twice to be removed from one section and added to the next.
    3. Select Hide from navigation to prevent showing an item in the navigation.
    4. Select Advanced to use a different Default navigation width.
      The selected width is applied to the entire navigation panel.
    5. Select + New > Section to add an outside link to the app navigation. Enter a new link Name, provide the Link URL, specify where it should Open in (for example, a New tab), and select the Group (section) in the navigation where it should appear. To delete it, select Remove.
      The +New option marked with E and link circled in red.
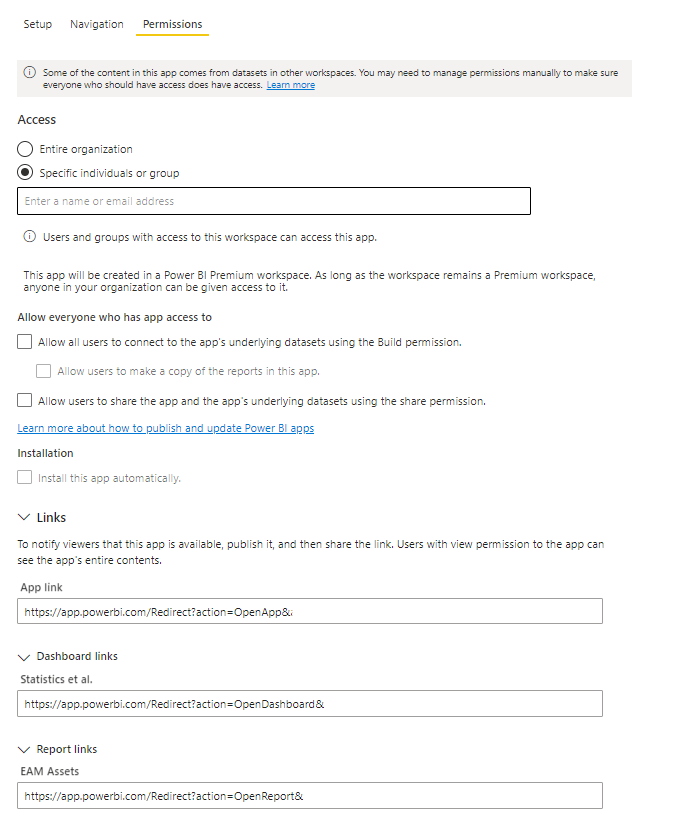
  6. On the Permissions tab, do the following:

    The Permissions tab.
    1. Select who can Access the app.
    2. Clear Allow all users to connect to the app's underlying datasets using the Build permission, Allow users to make a copy of reports in this app, and Allow users to share the app and the app's underlying dataset using the share permission.
      Because ViewPoint is a multi-tenant solution, these options don't work well with the application.
    3. If available, you can Install this app automatically.
      This option is only available for Specific individuals or group access and only if you have been granted the correct permissions by an administrator and is typically done when most users are not working. If users don't see the app after it has been pushed out to them, they should restart their web browser.
    4. Copy any links you plan on sharing with other users. Typically, app links are provided to consumers so that they can directly access published content.
  7. Select Publish app.
The app is now available to be used.