Defining Scheduling Status Modifier Jobs
Schedule status and booking subtype information can be updated based on existing booking subtypes, schedule status, and the elapsed time from creation.
Before you begin
Procedure
- Select a job from the grid.The scheduled job record settings are shown in the Job Schedule frame.
- Confirm the Agent Name PassScheduleAgent is defined for the job schedule.The selected agent determines the options that are available in the Job Type field.
- Click Job Data.The Job Data dialog box appears.
- Define the schedule type and date information:
- In the Job Type field, select Scheduling Status Modifier. If no Job Types are available, confirm that an Agent Name has been selected in the Job Schedule frame of the Schedule Job Agent dialog box.
-
Click New.
The New Batch dialog box appears.
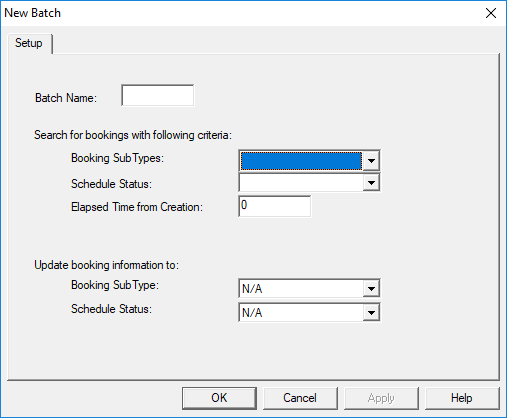
- Type the Batch Name for the job step.
-
In the Search for bookings with following criteria section, do the
following:
-
In the Update booking information to section, do the
following.
- Select the Booking SubType to which the selected bookings should have after the job is run.
- Select the Schedule Status to which the selected bookings should have after the job is run.
- Click OK.
-
Click OK.
The Job Data dialog box closes.
- Click Save.