Adding Attribute Rules
The Attribute Rule Configuration screen allows you to add rules that you want to apply to amenities.
-
Click Attribute Rule Configuration in the Stop
Manager list.
The Attribute Rule Configuration screen appears.
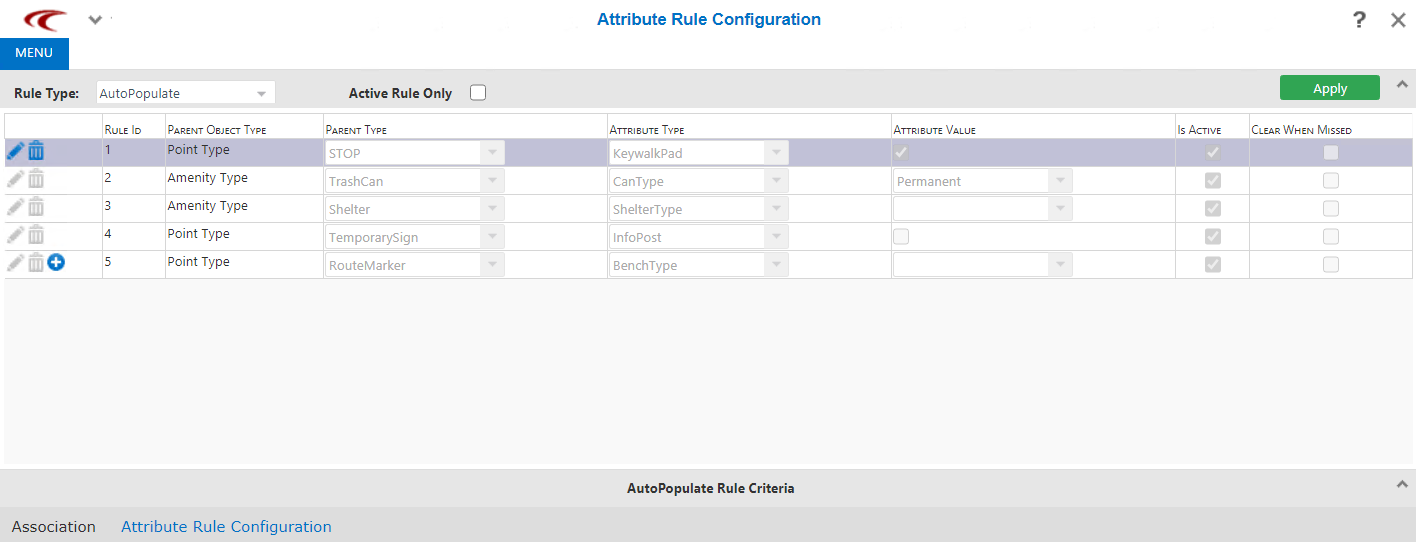
By default, the upper pane of the screen is open while the bottom pane, AutoPopulate Rule Criteria is closed.
-
On the toolbar in the first column, click the New button:
 .
The Add Attribute Rule dialog appears.
.
The Add Attribute Rule dialog appears.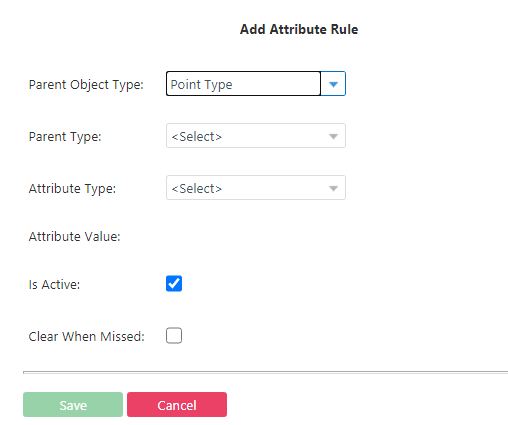 Note: Your choice from the first field determines the options that appear in the succeeding field, for example, the selected Parent Object Type determines the options shown in the Parent Type drop-down list box.
 -
Select the appropriate values for the following fields:
-
Parent Object Type - Choose Point Type or Amenity Type.
-
Parent Type - If you chose Point Type as the Parent Object Type, choose types such as Stop, Node, or Kiosk. If you chose Amenity Type, choose the appropriate amenity.
- Attribute Type - Choose the applicable attribute for the selected Parent Type. Each Parent Type has its own set of attribute types. The Attribute Value field is shown with the appropriate values for the selected Attribute Type.
- Attribute Value - This field is activated after you select the Attribute Type. Enter or choose the applicable value for the selected Attribute Type. The options that appear in this field typically indicate availability, size, condition, or material type of the attribute.
-
- To activate the attribute rule, select the Is Active check box.
- Optional: To clear the attribute value when the candidate point does not match the rule's criteria, select the Clear When Missed check box.
- Click Save.
- Optional: To apply the new rule to existing attributes, click Apply, which is in the upper right corner of the screen.