Creating and Managing Work Orders
Work orders are the forms that authorize the completion of specific tasks. With BSM, you can create work orders for maintaining and repairing bus stop amenities. It allows you to create separate work orders for each bus stop.
- - If this is selected, you are also sent a copy of the notification.
If configured, an email message is sent to the assigned operator and reporter.
You can choose to create the work order from the Work Order screen or attach it directly to a stop in the Points screen. Either approach follows similar steps. The following procedure illustrates creating a work order for a specific stop:
-
Click Points on the Stop Manager
list.
The Points screen appears.
-
Search for the bus stop for which you want to create work orders.
The Points screen lists bus stops that match the search criteria.
-
On the Points pane, select the bus stop, and on the screen
toolbar, click the Work Orders button:
 .
The Work Orders screen appears.
.
The Work Orders screen appears.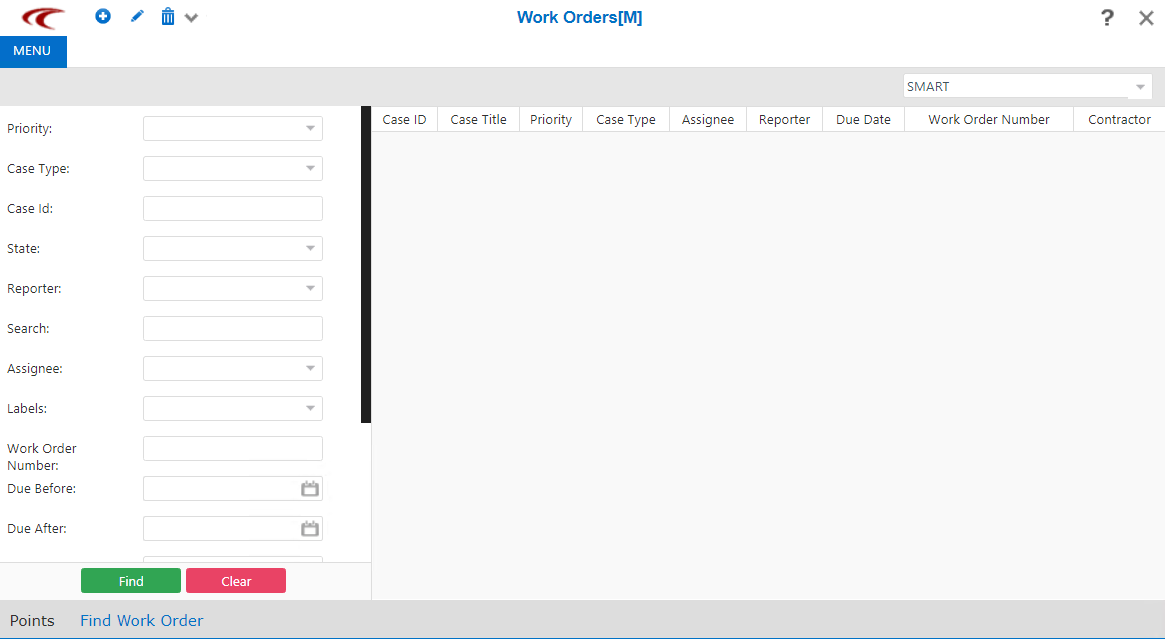
-
On the screen toolbar, click the New Work Order button:
 The Create Case screen appears.
-
In the Case Type drop-down list, select the case type that you
want to create, and then click Next.
Another screen appears with additional fields.
-
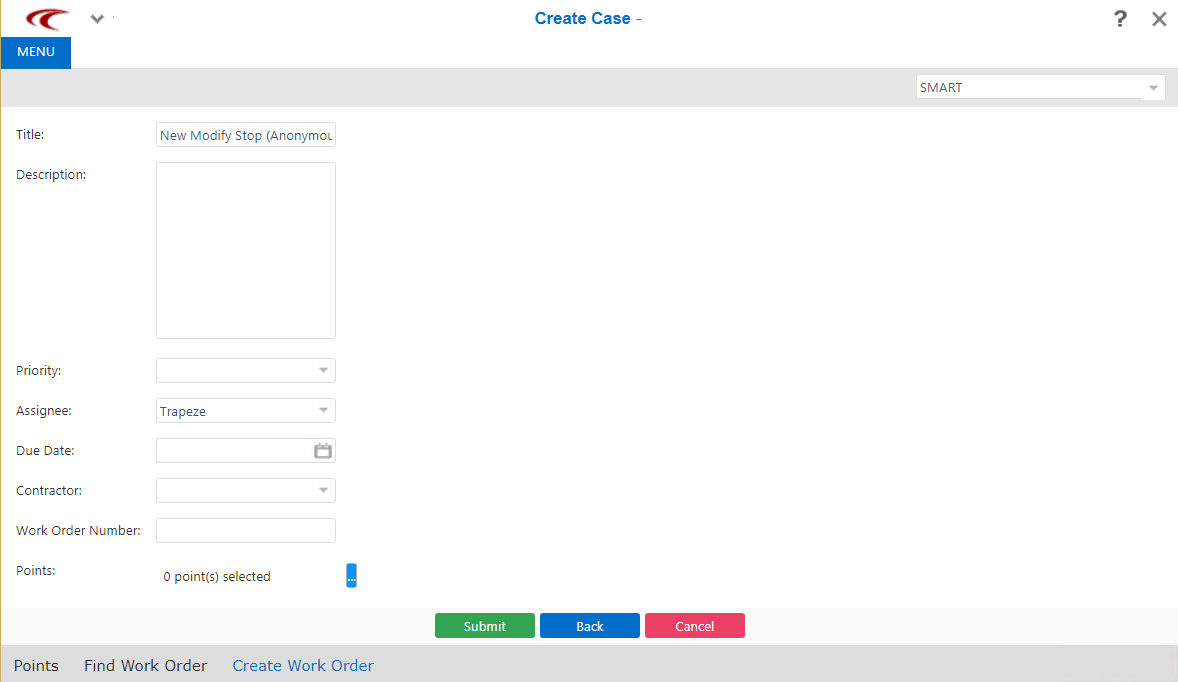
Fill in or select the appropriate value in the following fields:
- (Optional) Title: Overwrite the title that was automatically generated based on the Case type. The text includes your user name and date and time when you started the new work order.
-
Description: Enter a description of the work required to be completed.
-
Priority: Select the appropriate priority level: Critical, High, Medium, or Low.
-
Assignee: Select the person to be assigned to complete the work order. An employee may be set as the assignee for work orders that you create by default.
-
Due Date: Select the date that the work is required to be completed.
- Contractor: Select the appropriate contractor.
- Work Order Number: Add the appropriate number based on your site’s numbering convention.
- Points: Click the ellipsis button, and on the Manage Points screen, select the point that you want to associate with the work order in the Manage Points screen.
-
Click Submit.
The Case Number (Details) screen appears. (The X stands for the number assigned to the work order. The format depends on what was defined in the Work Order Number context property.)
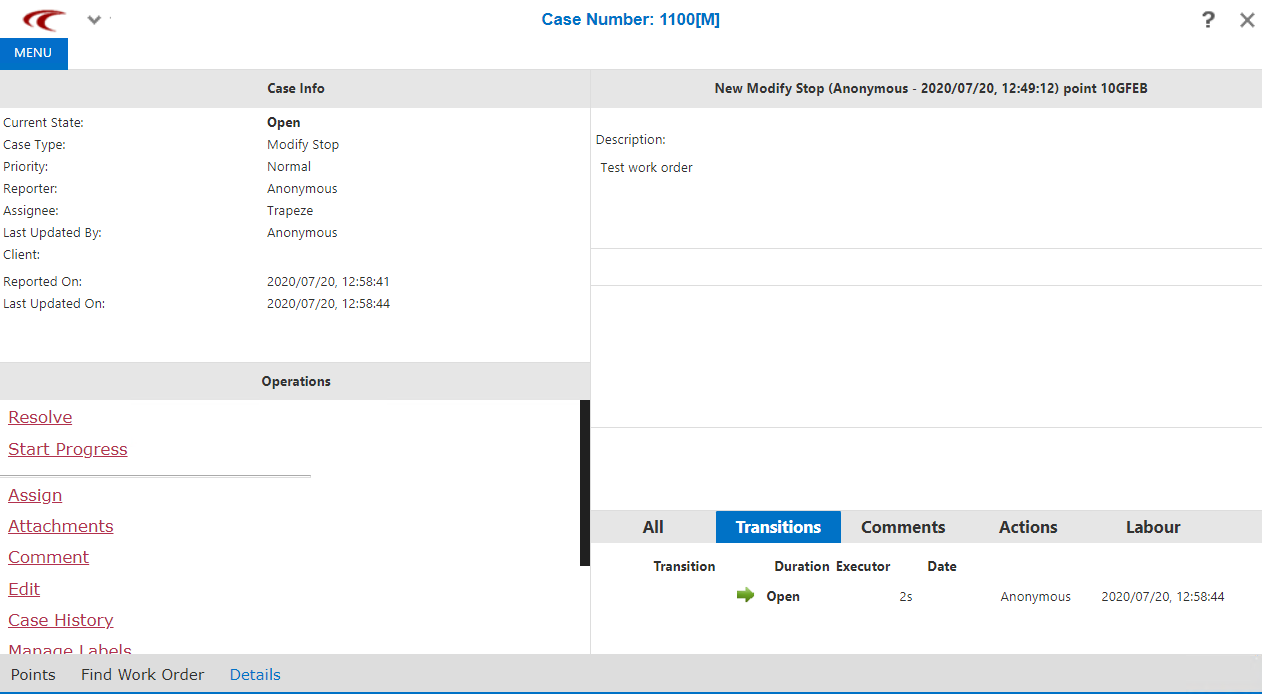
The screen is similar to the Details screen that appears when you search for existing work orders.
The screen is divided into three panes:- Case Info - Provides information such as the state, type, assignee, and dates associated with the work order.
- Operations (lower-left pane) - The first options that appear are the states and state transitions that define the workflow. See Defining the Work Flow for more information.
- New Modify Stop (right pane) - Contains a Description field in the upper frame, Labels frame in the middle, and tabs that categorize the information in the bottom frame.