If your stops have been geocoded, you can select them on map and add them to the
selected line on the Drive tab.
-
To open the system map, click System Map:

-
Click or click Edit:

The Edit dialog box appears. Open the Drive
tab.
-
Press SHIFT and on the system map, click the points along the
route trace (from the start point to the end point).
-
In the Select frame, depending on whether you want to add nodes or
stops or both, choose one of the following options:
- Nodes Only
- Stops Only
- Both
If you choose Both and require a node to be added as a stop, you
must edit it manually after it has been added to the line.
-
In the Search in field, overwrite the value set as the default
within which you want to search for stops in the system map. For example, type "30". The
system uses the unit of measure specified in the Distance property in tab.
- Optional:
Select the following options as required:
- Left Side - If the vehicle is expected to go to a stop on the
left side of the street.
- In Service Only - To display the stops that are in service in
the grid only
-
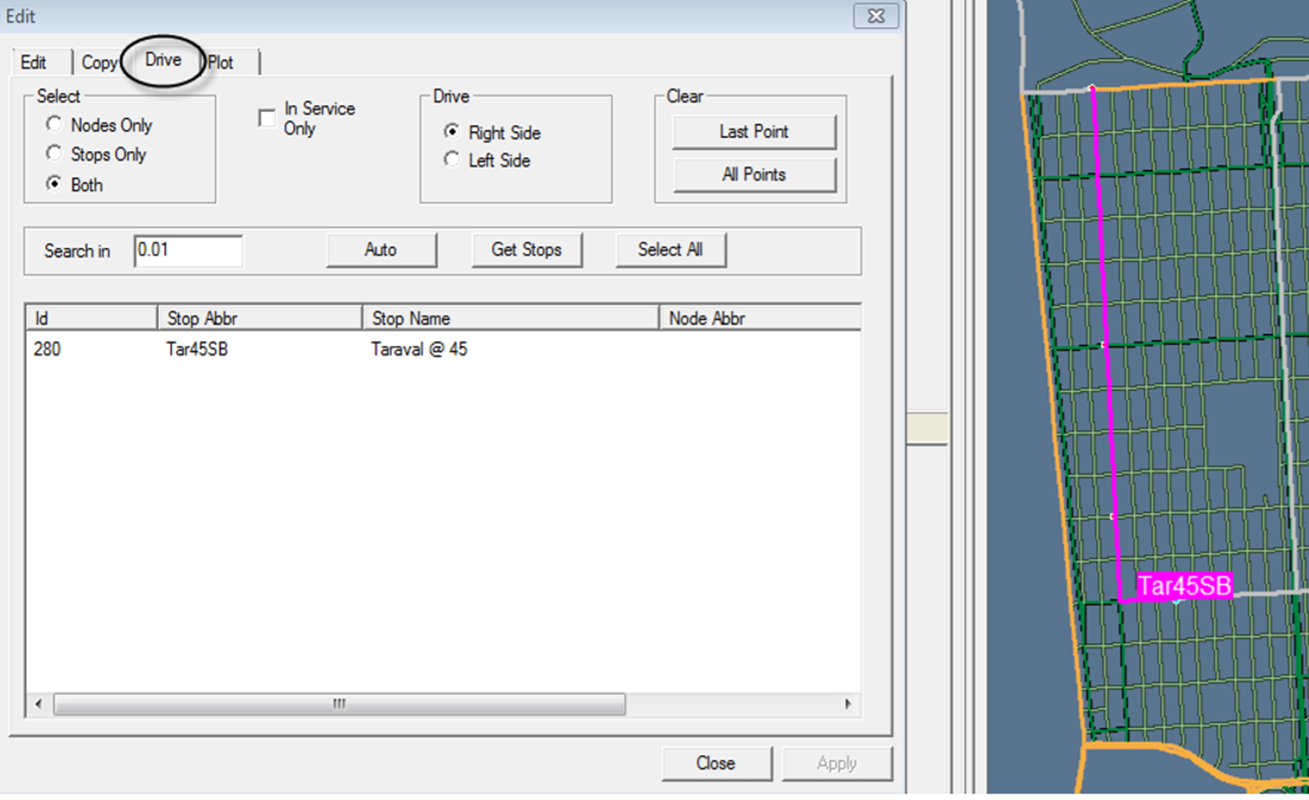
Click Get Stops. The stops found within the radius of the search
area you clicked on the system map appear in the grid. They are arranged in sequence
between the time points. The following sample result in the graphic shows one stop, which
is also highlighted on the map.
-
Select the stops on the grid that you want to associate with the route on which you are
currently working.
- Optional:
To include all the stops in the list, click Select All.
- Optional:
To select another set of stops, click Clear. The previously
selected points disappear from the system map. Repeat steps 3 to 8.
-
Click Apply. The selected stops are now associated with the
route in your current context.
-
Click Close.