The Unattended Reliefs tab is used only if your site also has
the BlockBuster module.
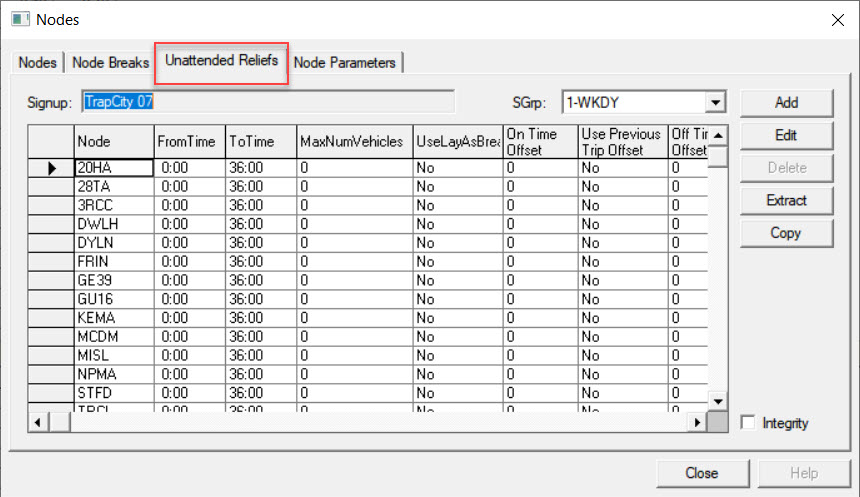
The Unattended Reliefs tab is used to establish relief
points where the vehicle will be left unattended by the driver. This is useful for occasions
where there are gaps in the service, and you do not want to pay someone to sit with the
vehicle or pay to have the vehicle driven back and forth from a garage.
On the Unattended Reliefs tab, click Add.
The Add dialog opens.
In the Node dropdown list, select a node.
In the From Time and To Time fields, type
values to create a time span within which the relief is legally unattended.
In the MaxNumVehicles field, enter the maximum number of
vehicles which can be on an unattended relief at one time at this particular node.
To use the unattended relief as a layover for the driver, for which he or she will be paid, select the UseLayAsBreak checkbox. Leave the checkbox clear for a non-paid relief.
In the On Time Offset field, type a value, which is the time a
driver must remain with the vehicle at the start of the unattended relief.
In the Off Time Offset field, type a value, which is the time
before departure that the driver must be back at the vehicle.
(If Applicable) To enable the system to pick up the arrival time of the previous trip instead of the cut time as the driver's On time, select the Use Previous Trip Offset checkbox. This is used for driver blocks.
Click OK.
Optional: To load all unattended reliefs into the dialog, click
Extract on the Unattended Reliefs
tab.
Optional: To check for overlapping records based on the From and To times, select the
Integrity checkbox.