Creating Buffers with a User-Defined Trace
You can create buffers using a user-defined route trace.
-
Press SHIFT while clicking points for the route on the map.
As you move from point to point, a trace appears on the map (see the dark line in the following example).The trace follows the street network along the shortest path between each point that you click (waypoints).
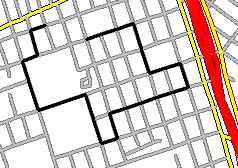 To move the map while drawing your route, release SHIFT, adjust the map view, press SHIFT again, and then continue clicking points on the map.
 -
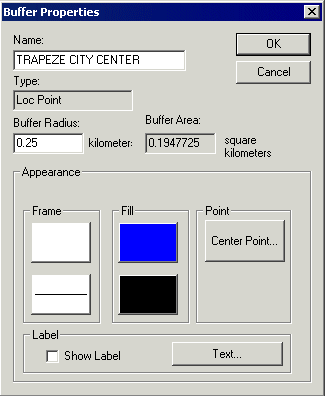
To define other attributes of the new buffer:
-
Select the new route trace and in the Existing frame, click
Properties....
The Buffer Properties dialog box appears.
-
Select the new route trace and in the Existing frame, click
Properties....