Place text in quotation marks for exact match search results.
Adding Manual Notifications
The Notification Manager can be used to send one of a kind notification messages.
Select one or more recipients of the notification; enter or select the recipient
addresses one at a time.
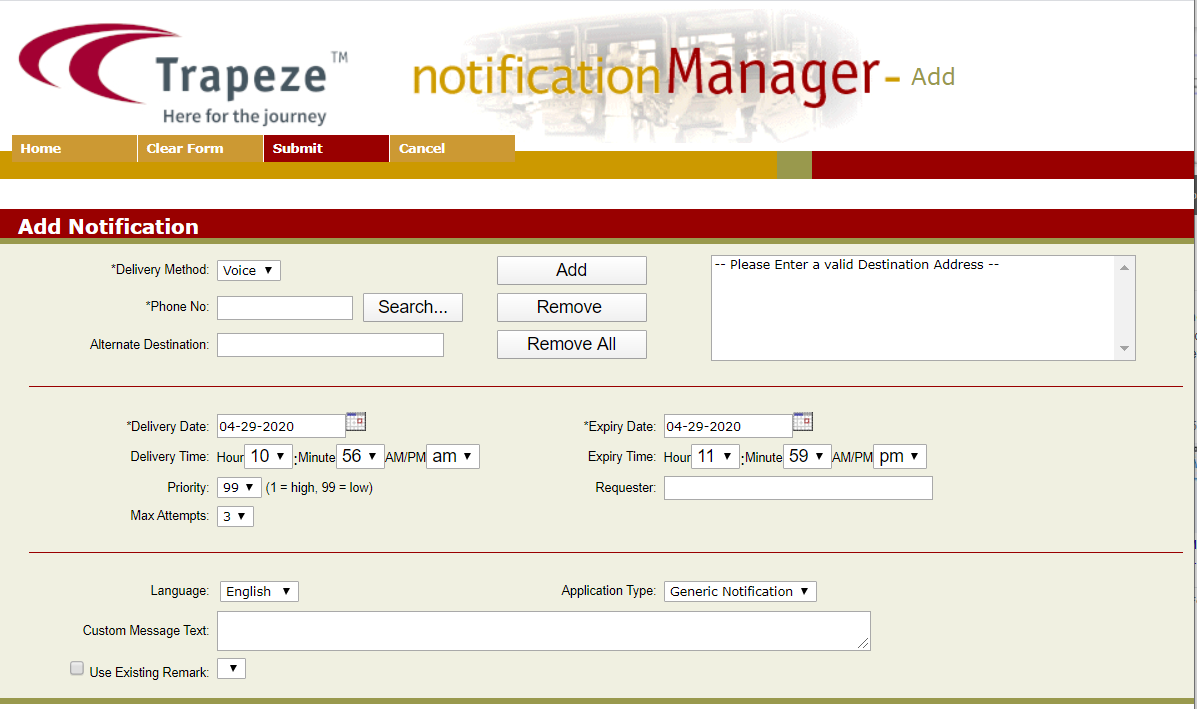
On the Notification List screen, click Add
on the screen toolbar.
The Add Notification screen appears.
In the Delivery Method list, select Voice for IVR
notifications.
In the Phone No field, type the phone
number of the client to which you want to send the notification.
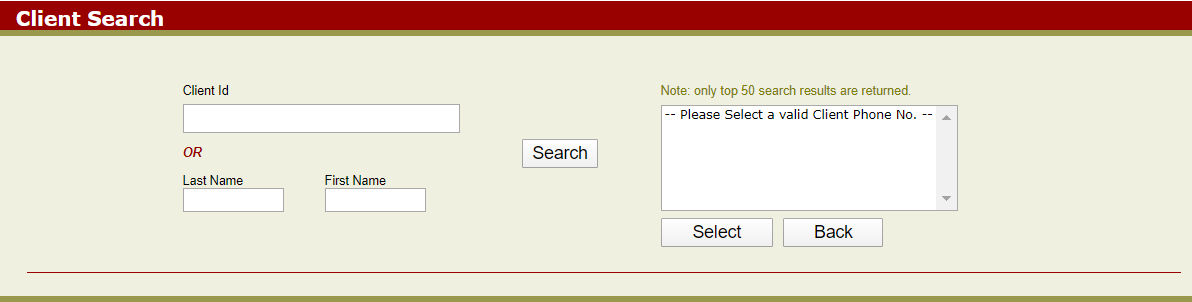
Optional: To search for a phone number from the PASS Clients
database:
Click Search. The Client Search screen
appears.
Either type the client’s Client ID or last and first names in the appropriate
fields and click Search. If available, the phone number
associated with the client is shown in the text field on the right section of the
screen.
In the text field, select the phone number that you want to call and click
Select.
You are returned to the Add Notification screen. The
client’s phone number is shown in the text field on the right section of the
screen.
Click Add.
The phone number is added to the list of destination addresses.
Repeat Step 3 until you have a list of all the phone numbers to which you
want to send notification messages.
In the middle pane, choose a delivery date and time to place the message in the system
queue.
Choose an expiry date and time so that the system does not attempt to send undelivered notifications after a specific date and time.
In the Priority field, choose a priority for the message. The
range is from 1 (highest) to 0 (lowest).
In the Max Attempts field, set the number of times that the
system should attempt to send the notification before it is marked as failed.
In the bottom pane, select the language in which the message should be delivered in the
Language list.
In the Custom Message Text field, type the text in the selected
language for the notification call.
In the Application Type list, Generic
Notification is selected by default.
Click Submit on the screen toolbar.
A summary of the notification information appears.
Click OK to return to the Notification Manager screen.