Adding Detailed Information to Location Records
Once you have created a location record you can type detailed information about the location on the Detail tab.
Before you begin
Procedure
- Click the Detail tab.
-
Provide the following information as required:
- Optional:
Define an Alias for the location.
Location aliases can be used as a shortcut when searching for locations. For example, in Trip Booking, in the Destination pane, when Location is selected in the address type list, you can type the alias in the field next to the address type list.

- Optional:
Define an Alias for the location.
-
Define the time it will take clients to board or alight the vehicle at this
location:
-
In the Vehicle Type Exclusion field, click any vehicle
types that cannot be used with the location.
For example, the vehicle type is excluded because it requires a large parking area to maneuver and the location is at a busy intersection.If trips have already been booked for this location, run the location change wizard to update the bookings with the vehicle type exclusions.
-
In the Jurisdiction Polygon field, click the polygon to
which the location belongs.
Polygons listed here are determined by the polygon type selected in , on the Profile tab, under .When you type and geocode an address, the jurisdiction polygon within which it is located is automatically shown in the Jurisdiction Polygon field. Sometimes, an address may be located within more than one polygon. Click the field to show the list. An asterisk (*) marks the polygons that the address falls under.
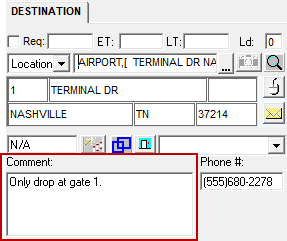
- In the Address fields, type the address of the location and geocode it on the system map.
- Type the Phone number of the location.
- Optional:
If additional contact information must be defined, click the Contact
Info button.
Use the Contact Category dialog box to add more contacts and contact methods for the defined Contact Type and Facility.
- Optional:
Identify an accessibility option for the location:
-
Click the Accessibility button:

The Accessibility button also appears in other screens, such as Trip Booking and Client Registration. It provides additional information on the accessibility features of the location.
-
Click the Accessibility button:
-
Type a Comment about the location.
This comment appears in Trip Booking if the location is selected as the Origin or Destination of the trip.
- Optional:
Define an audience for the location:
To define who can see a location record, the security permission must be granted.
To see a location record's audiences, the security permission must be granted.
-
Click the User or User
Groups button and select any users or users groups that
should have access to or should not have access to the location
record.
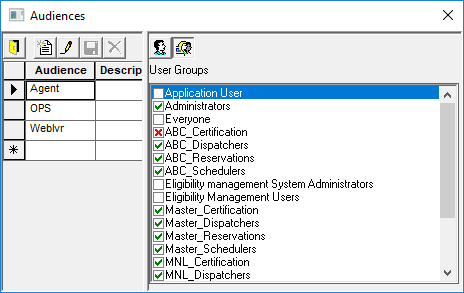
Click the check box for the user or user group until the desired setting appears.
For Agent, the following- green check mark
- The user or user group has permission to access the location (granted).
- red x
- The user or user group does not have permission to access the location (denied).
- empty check box
- The user or user group does not have permission to access the location (none).
-
Click the Save button:

-
Click the User or User
Groups button and select any users or users groups that
should have access to or should not have access to the location
record.
- Add any required Supplementary Data information.
- Click the Save button:
