Segment names can be added or edited as required.
Make sure that you have write access to the map data.
-
Select one or more segments for which to change the segment name.
-
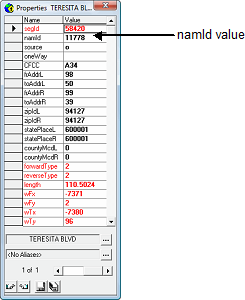
Click , or click the Properties button:

The Properties dialog shows information for the current
selection.
-
If multiple segments are selected, do one of the following steps:
-
To change the current segment for which property values are being edited, move the
scrollbar to a new position.
-
To edit property values that are shared by all selected properties, move the
scrollbar to the far left. Selected segments on the map remain selected, but none is
rendered as current. The Properties dialog shows field values
that are the same across segments.
-
Do one of the following steps:
- Click the namId field, and then click the arrow in the
field.
- Click the ellipsis [...] button beside the street name at the bottom of the dialog. The Name Properties dialog appears.
-
Click one of the following buttons:
- Add New - Add a new street name to your segment, by
clicking the button and then selecting or typing values in the remaining
fields.
- Find Existing – Name an existing street name by clicking
the button, and then selecting the street name in the Street Wizard. Values are
populated in the remaining fields.
- Global Rename – Globally change the existing street name
and apply the name to all segments with the corresponding namId by clicking the button,
and then editing or typing in all the fields required.
The updated name is saved in the mapNam table and the name of all
segments with the corresponding namId will change.
-
Click Update .
-
Click another segment in the map.
-
If prompted to confirm the action, click Yes .