Place text in quotation marks for exact match search results.
Adding Ride Check Data in Hand-Held Computers
You can enter ride check data into a hand-held computer with the Android mobile
operating system.
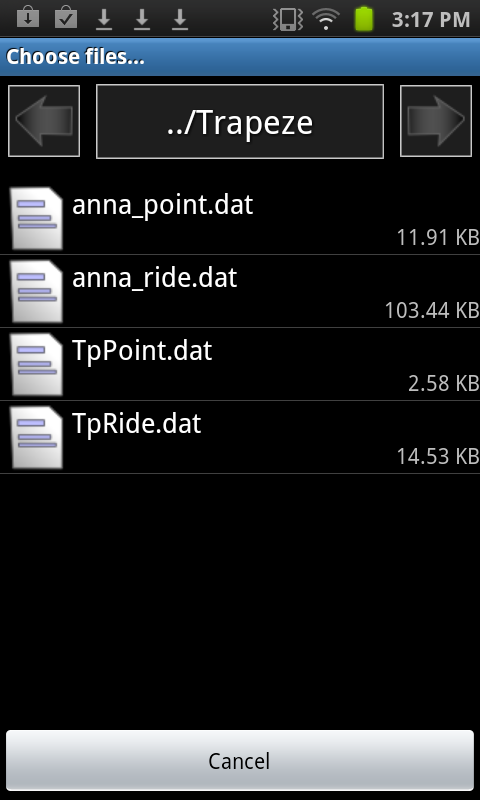
On the Trapeze front screen of the hand-held computer, tap Choose Point or
Ride check file.
A list of data files appear.
Select the data file you want to open.
If only one ride check assignment was downloaded to the hand-held computer, only one
item is shown on list.
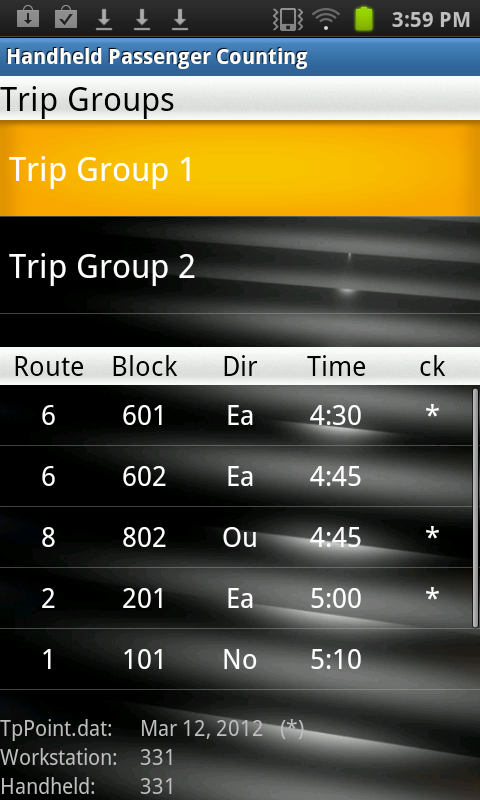
A list of trip groups is shown on the screen.
Highlight the trip group shown on the screen. If more than one trip group appears, select the trip group that is assigned to you.
The list in the bottom pane of the screen displays all the trips in the selected trip
group.
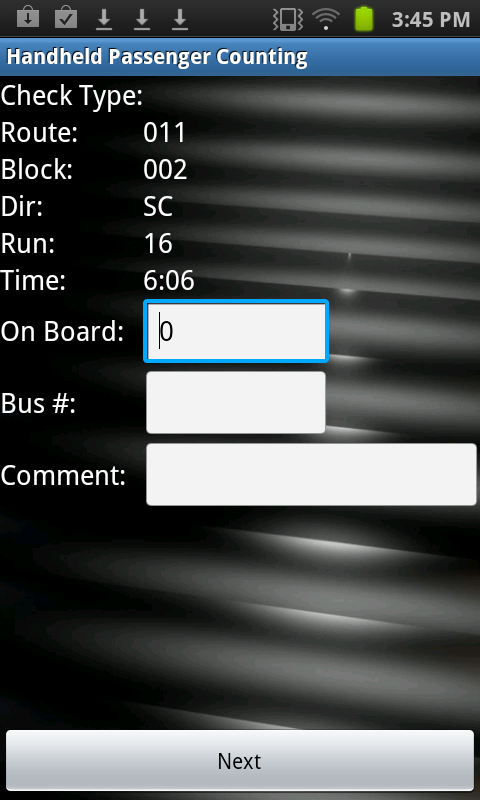
Tap the trip to be checked.
The screen shows the route, block, direction, and start time of the selected
trip
Tap the On Board field and enter the number of people on board
the vehicle at the start of the trip by tapping the appropriate values on the number
pad.
Tap the Bus # field and enter the bus number of the vehicle by
tapping the appropriate values on the number pad.
Optional: Tap the Comment field and then, tap the keyboard icon to display
a virtual keyboard. (Icon is located at the bottom-right of the screen.) Use the keyboard
to enter a comment.
As you start forming a word, the computer displays a list of common words that start
with the letters you have entered. If the word that you want to type is on the list, tap
it and it is entered in the Comment field.
Tap Next.
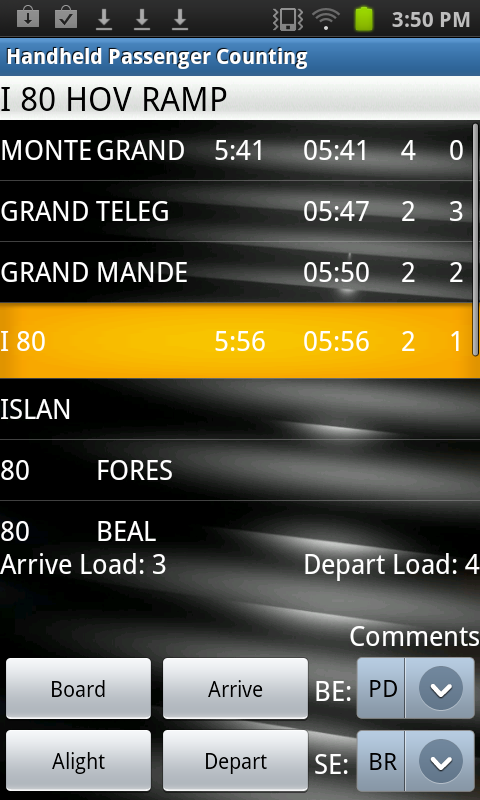
The screen shows all the nodes and stops for the trip, highlighting the first
node on top of the list.
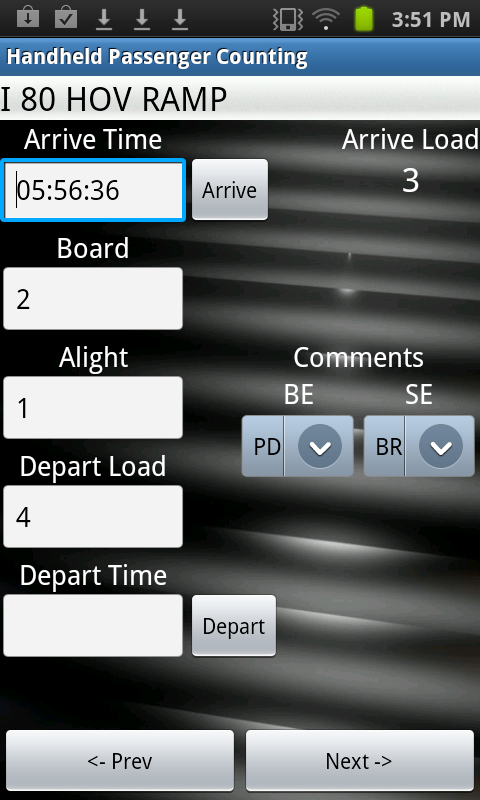
Do one of the following steps to type the check data:
Option 1:
On the current screen, tap Arrive when the vehicle arrives
at the node/stop.
Tap Board once for each passenger who boards and
Alight once for each passenger who leaves the vehicle. For
example, if five passengers board, tap Board five times.
Tap Depart when the vehicle departs from the
node/stop.
Tap Prev to return to the list of nodes/stops.
Option 2:
Tap and hold the node/stop to open another data entry screen. This screen displays
a number pad that you can use to enter board, alight, arrive, and depart data. Make
sure that you tap each option before you enter the numerical data. For example, tap
Board before entering board data.
Tap Prev to return to the list of nodes/stops.
Select the next stop/node and repeat the data entry process.
Optional: To add a comment, choose from the predefined comments in the
Comments list of the appropriate route direction.
The examples in the graphic show PD and DR to indicate route direction. The comments
that appear in the Comments list are created as ancillary
data.
When the ride check is complete, tap Prev until you return to
the Trip Groups screen.
The trip is marked by an asterisk (*) to signify that it has been
checked.