Creating a Linked Return Trip
Once you have saved a casual or subscription booking, you can create a return trip that is linked to the first booking.
Before you begin
About this task
If a client cancels one of the linked trips, the other trip or trips can automatically be canceled. For example, when a client books a trip to the airport on Monday and a return trip home on Friday, if the client cancels the trip to the airport, the system prompts to cancel the return trip as well.
Procedure
- Select a client for whom to book a trip and create the first trip.
-
Click the Reverse and Link button:

A new booking is created for the client.The Destination address from the original booking is populated on the Origin tab, and the Origin address from the original booking is shown on the Destination tab.
- Type the requested trip time and fill in the fields where necessary.
-
Click Save.
The return booking is saved.
- Click the Itinerary tab.
Results
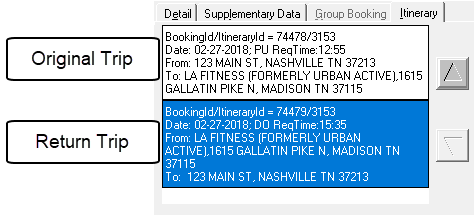
When you schedule one booking, the system allows you to schedule linked trips as well.