Editing Screen Layouts
The Edit Layout feature enables you to customize some Bus Stop Manager screens based on your specific requirements. You can determine if a screen is customizable.
Note: You can also perform these tasks when creating or editing a user-defined
report on the Parameter tab in the Report Designer
screen.
-
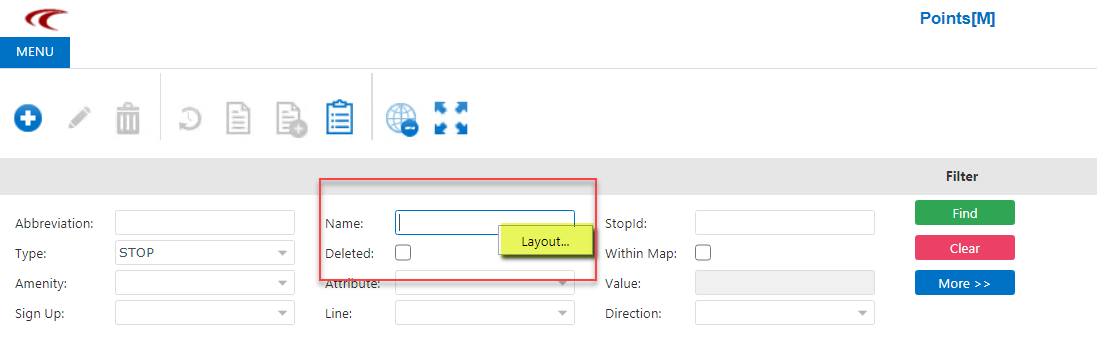
Right-click any of the fields on the screen. Using the Points
screen as an example, hover the pointer over any field or space on the Filter pane and
right-click.
The Layout option is shown in the shortcut menu. The following graphic shows the option highlighted:
-
Click Layout.
The Filter dialog appears with the Available Fields tab open by default. The following graphic shows the fields for the Points screen:
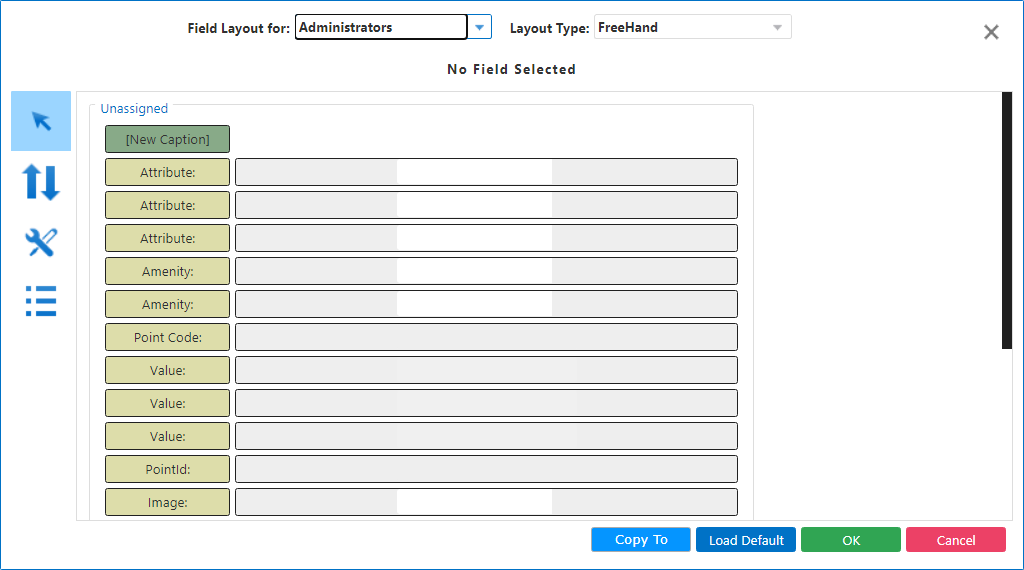
- In the FieldLayout For drop-down list, select the user group for whom you want to design the layout.
-
In the LayoutType drop-down list, click the type you want to apply:
- Freehand
- FieldSet
-
Select the field on the screen that you want to modify, and make the necessary changes
in the Filter dialog using the options on the vertical toolbar:
 - Tab Order
 - View Properties
 - Properties
- Optional: To copy the layout for other user groups, click Copy To, and select the group you want from the drop-down list.
- Click OK.