Customizing the List View
Typically, a List View is in the form of a grid that can be shown or hidden.
-
Open the screen you want to customize.
Note: In the case of a split screen, make sure that the pointer is in the pane where you wish to work.
-
Click the Customize Grid button:

Alternatively, right-click on the screen and select Customize from the main toolbar.
The Customize dialog appears.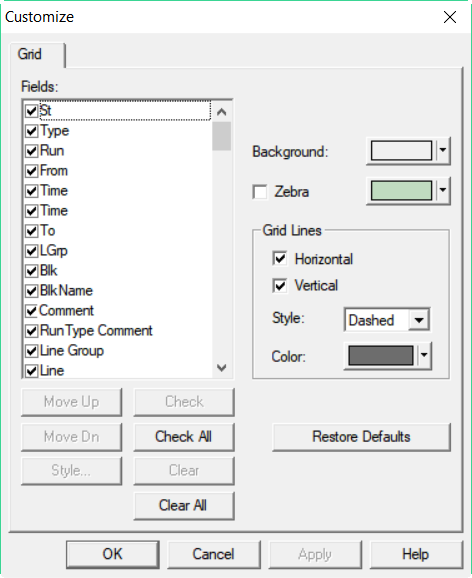
- In the Fields list, select the check boxes beside the fields you want to appear in the grid. Alternatively, click Check All to have all the fields displayed on the grid.
-
Perform any of the following steps to modify the color and appearance of the rows and lines:
-
Select a field and apply any of the features described in the Grid Options table.
-
Change the background color of the grid and the rows if you choose to apply the Zebra mode
with the color controls.
-
In the Grid Lines frame, select the line orientation, style, and color that you want to apply to the grid.
-
- Click Apply.
- Click OK.