Adding Waits and Travels
The waits and travels information is created in two sets of steps.
-
Click .
The Waits and Travels dialog box appears.
-
Click Add.
The Add dialog box appears.
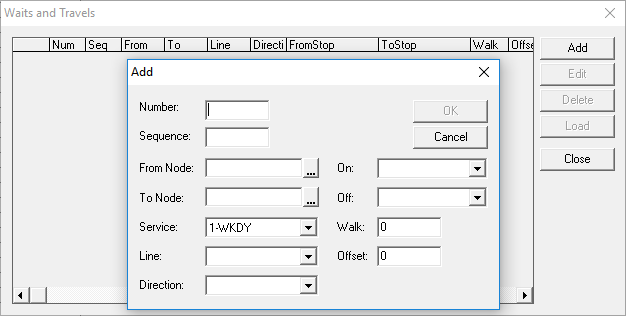
- In the Number field, type the applicable number of the wait and travel from the series of numbers you are using.
- In the Sequence field, type the applicable value depending on the number of routes used in the travel.
- In the From Node list, select the applicable relief point or garage from which the operator begins the travel.
- In the To Node list, select the applicable relief point or garage to which the operator ends the travel.
- In the Service list, select the appropriate service.
- In the Line list, select the appropriate line.
- In the Direction list, select the appropriate direction. Depending on the direction you select, the appropriate node or garage appears in the On or Off field.
- Optional: To change the location in the On or Off field, select another node or garage from the On or Off list.
- Optional: In the Walk field, type the length of time the operator walks to the relief point or garage where he or she begins the travel, for example, 10 for ten minutes.
- Optional: In the Offset field, type the time difference between the To Stop and the location at which the operator gets off.
-
Click OK.
Note: To edit or delete a wait and travel in the Add dialog box, click Edit or Delete accordingly.