Creating Absence Requests on Smaller Screens
Create absence requests directly from the calendar or from the Absences page.
-
Select the menu icon (
 ), then Absence Requests.
- Optional:
Check your accrual balance.
For more information, see Viewing Accrual Balances on Smaller Screens.
-
Select +Request Absence.
You can also create an absence request from the Calendar page by selecting +Request and then Request Absence.
-
Select an Absence Type.
Selecting an absence type may show new fields that need to be completed.
- Absence Reason
- Reason for the absence.
- Absence Relationship
- Personal relationship associated with the absence. For example, brother if attending a brother's funeral.
- Accrual Year
- Accrual year associated with the accrual time to be used. For example, 2025 for vacation days accrued in 2025.
- Absence Quota Type
- Absence quota type to be used for this absence.
- Optional:
Check absence availability.
-
Define the absence length:
- For full-day absences, select Full Day (
 ) and then enter the From Date and
To Date.
) and then enter the From Date and
To Date.If this information is predefined for the absence type, you can't update it.
- For a partial-day absence, clear Full Day and
enter the From Date, From
Time, To Date, and To
Time. If applicable, select Next Day
(
 ).Note:The Next Day option only applies if your transit agency's operational day is more than 24 hours long and the entered time isn't in the first 24 hours of the day.
- For full-day absences, select Full Day (
- Optional: Enter any Comments about the request.
-
Select Submit Request.
If an absence type is associated with multiple accrual types and you get an insufficient balance error, use smaller date ranges (or one day at a time) to submit all of the desired days.
- Optional:
View the absence request.
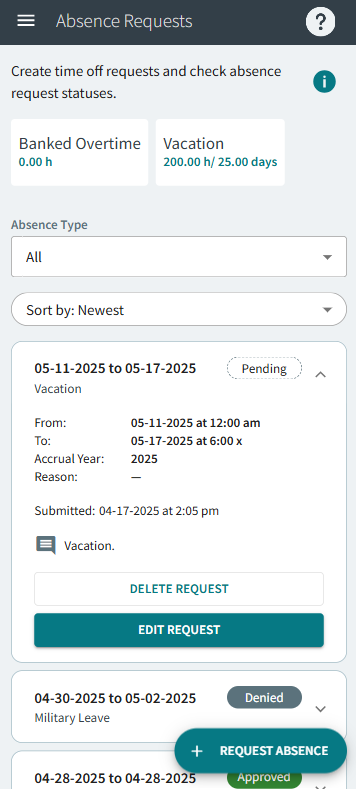
Table 1. Absence Request Status Definitions Status Definition Pending Absence request is waiting for review. Approved Absence request was granted. Note:Granted absence requests may be changed or deleted in OPS. Typically, a message is sent to you when updates are made to absence requests.Denied Absence request was denied.
Select Absence History to see your previously taken absences, including those entered by a dispatcher or supervisor. Filter records by Absence Type, From Date, and To Date, and sort the records as needed. By default, one year of absence history is shown.
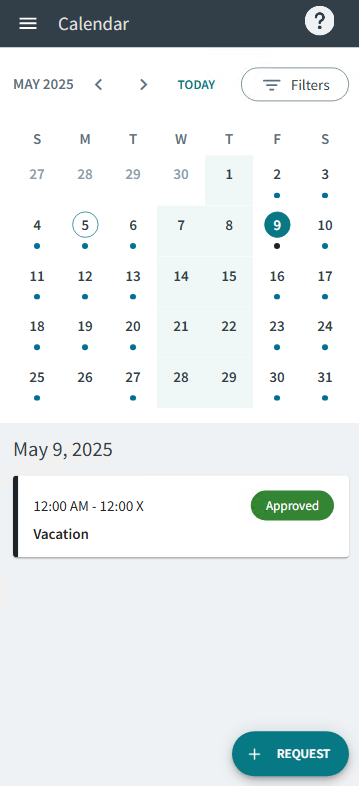
On the
Calendar page, you will typically see both your bid work
assignments and absences until the work day is activated.
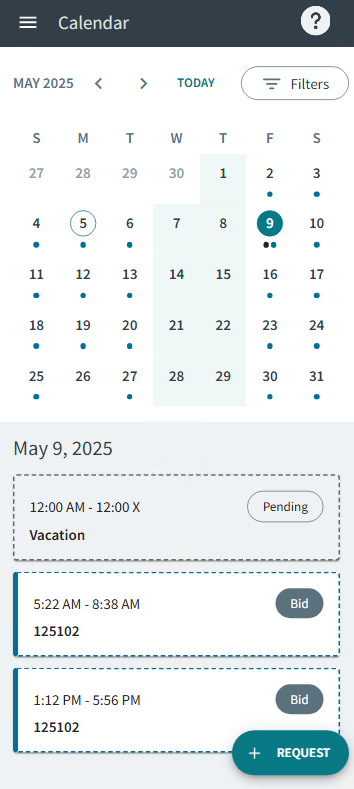
Then, only approved absences are shown.
Then, only approved absences are shown.
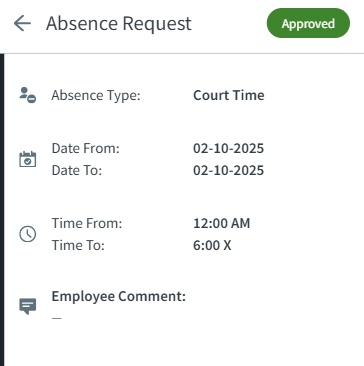
Select the calendar event to show more information about an absence
request. Typically, this is Absence Type, Date
From, Date To, Time
From, Time To, and Employee
Comment information.