Creating Reimbursement Reports
Reimbursement reports can be used to create lists of items for which additional costs have been incurred.
About this task
This screen requires that Rapid Response ancillary data has already been created for Labor and Materials.
Records that do not exist in the Configuration screen cannot be added to the reimbursement report.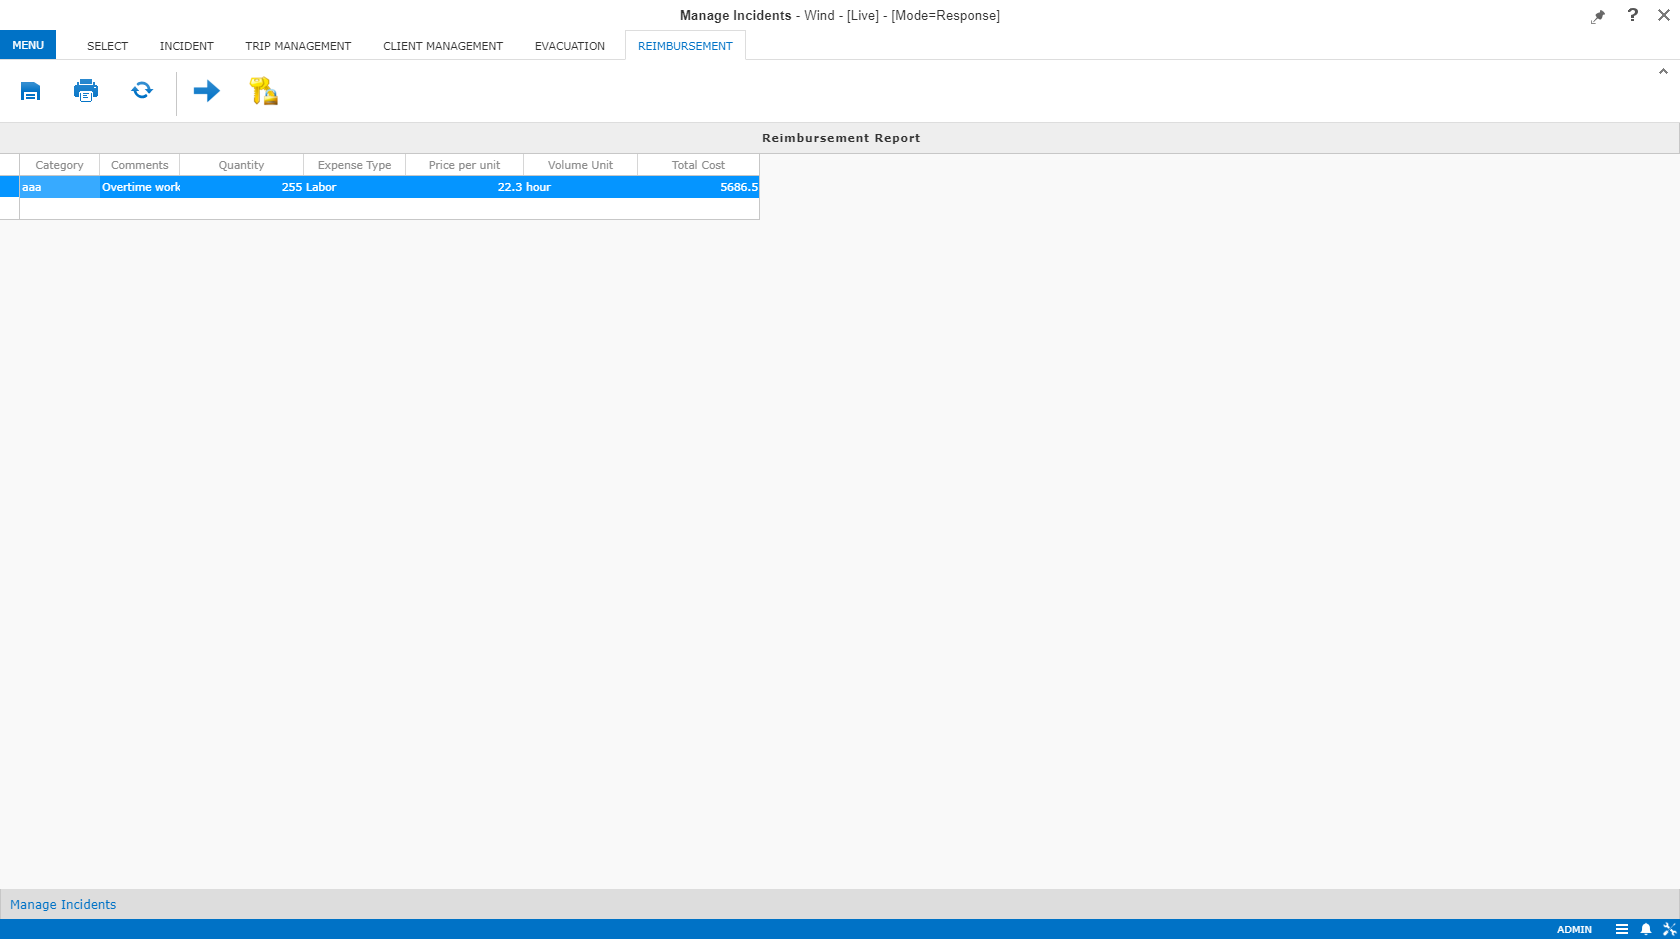
Procedure
-
Click the Main Menu button:

- Click Manage Incidents.
- Search for or create an Incident record.
- Click the Reimbursement step:
-
To add or edit a reimbursement item, in a blank row at the bottom of the grid, provide
the following information:
- Expense Type
- Click the expense type in the list (either Labor or Materials).
- Category
- Click a category in the list.
Categories are defined using the Description field in Labor Types and Material Types ancillary data.
- Comments
- Type any comments about the reimbursement.
- Quantity
- Type the quantity or amount of materials or labor to be reimbursed.
- Price
- Type the price of the material or labor.
The values in the Unit column are automatically populated based on ancillary data. The Total cost column is automatically calculated.
-
To recalculate the values in the Total cost column, click the
Recalculate button:

-
Save the report:
-
Click the Save button:

- When prompted to confirm the save, click OK.
-
Click the Save button:
-
To export and print the report, click the Print button:

Only *.CSV format is currently supported.