Manual Runcutting
The fields in the Manual Runcutting dialog are automatically filled as you select a relief point or garage on the left side of the dialog.
- In the right grid of the Runs tab, select a piece that you want to cut.
-
Click .
The Manual Runcutting dialog appears. The fields in the right section of the dialog show the corresponding statistics of the selected piece.
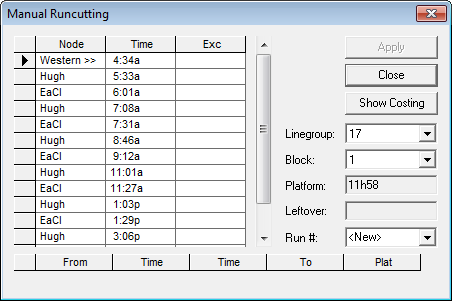
- Press SHIFT and from the grid in the dialog, select the relief point or garage from which the run is to begin.
- Press SHIFT and select the location to which the run ends. The statistics of the segment you selected appear in the right portion of the dialog and in the grid below the list of relief points and garages.
- In the Run# field, type a run number. If you do not type a number, the system automatically stamps the run with the next available run number.
-
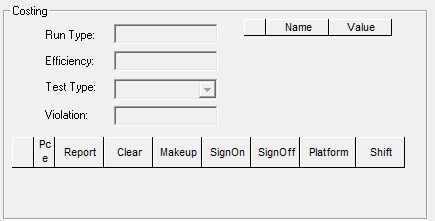
To view the details of the Costing data, click Show Costing.
The Costing frame appears in the lower section of the dialog.
- Review the statistics of the potential run shown in the dialog. It shows the start and end times as well as the calculated platform of the piece.
- (If applicable) To change the segment you selected, click the relief point or garage from which the run is to begin again. The fields are reset.
- Click Apply. The run appears in the Cut Pieces grid on the Runs tab.
-
To cut other required runs, repeat steps 3 to 9.
Alternatively, proceed to cut the remaining uncut pieces using the Automatic runcutting feature.
- Click Close.