Creating Purge History Jobs
Purge jobs specify the records to delete from specific tables and when the purge occurs.
- Select .
-
In the OPS HST Table Purging screen, select New
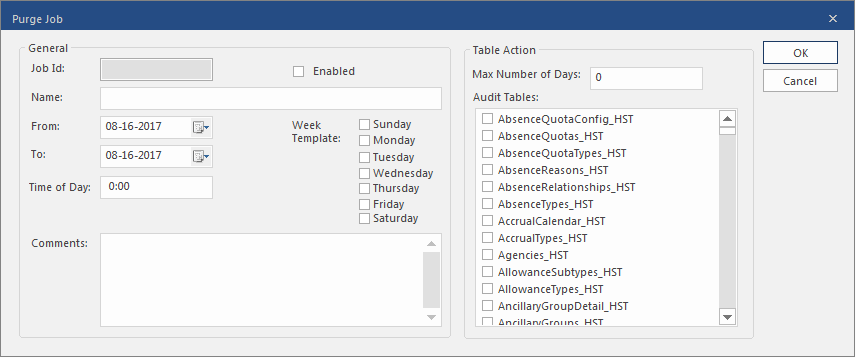
Job:

-
Enter a Name for the job.
The name appears in the Name field of the OPS HST Table Purging screen grid. Use any name that makes it easy for you to recognize the job purpose.
-
In the From and To fields, enter
the date range over which the job should run.
Leave the To field blank if there is no predetermined end date.
-
Enter the Time of Day the purge job should run.
The job starts at the specified time. Since the job may take some time, schedule it for a time when there is little activity on the server. For example, 2∶00 AM.
-
In Week Template, select the days that the job should
run.
You can schedule the job to run on any combination of days, but best practice is to schedule it for a day with little server activity.
- Optional:
Enter a Comment describing the purpose of the job.
The comment can help other users understand the purpose of the job.
-
Enter the Max Number of Days to keep in the table.
For example, if keeping the most recent quarter, you would enter 90. Every time the job runs, it would delete records made 91 days (or more) earlier.
-
Select the Audit Tables to purge.
You can select any number of tables. The more tables selected, the longer the job takes to run.
-
Selected Enabled.
This makes the job active. It now runs as scheduled. If you don't want jobs running every week, you can clear and select Enabled as needed in grid view.
- Optional:
To run the job immediately, select Run Now:
 A copy of the job is created with date settings set to the current date, the time set to the current time, and all days selected in the week template. The job runs immediately, but only one time.