Applying Node Relief Labels to Divisions/Services
You can edit or add the relief label for a division under the appropriate service in the Labels dialog box.
The setting of your reliefs/breaks in the Properties dialog box
determines what you see in the Division and
Services columns in the Labels dialog box. To
apply the related labels to divisions/services, make sure that the following properties are
set to Yes.
- Use Break Reliefs
- Use Created Pullouts and Pullins
- Use Unattended Reliefs
The abbreviations of the labels (for example, R for Use Break Reliefs) you applied to the node appear in the Labels dialog box.
Note: If you did not select the node as a relief, a dash appears on appropriate fields in
the Labels grid.
- On the Nodes tab, select the node whose label you want to edit.
-
Do one of the following steps:
- Click .
- Click the Edit button:
 .
.
The Edit dialog box opens. The data of the selected node appears in the Edit tab fields. -
Click Edit Labels.
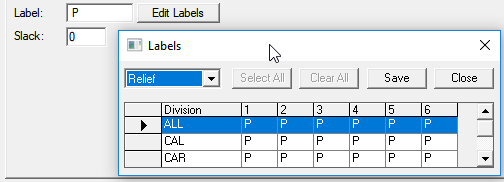
The Labels dialog box opens.
The Relief label is selected by default.
In a multi-agency environment, the divisions and services of the agency in the current context are shown in the grid. The following graphic shows the label P (for Pullout/Pullin) for the divisions.
- On the row of the division you want to add or edit, type or remove the label under the appropriate service. For example, you want to add a break relief to the node for a different division during the weekend (Sat), type "R" on the field under the Sat column on that division row.
- Click Save.
-
Click Close.
If you made any changes to the labels and did not save them before attempting to exit the dialog box, a message appears asking if you want to do so. Click Yes.