Creating Mass Messages in the Client Shell
Send information to a specific group of employees using a mass message.
- In the Client Shell, open the Daily Activity screen and set the Context (F3).
-
Select Send Mass Message:

-
Select the Divisions and Employee
Types of the recipients.
If no employee types are listed, confirm in Employee Types ancillary data that a Division Group is selected. Division groups are defined in the Ancillary Groups screen by selecting Divisions in the Context (F3).
- Enter the From and To dates through which the message should be visible.
-
Select employees in the left list and then select the >
button to add them to the recipient list.
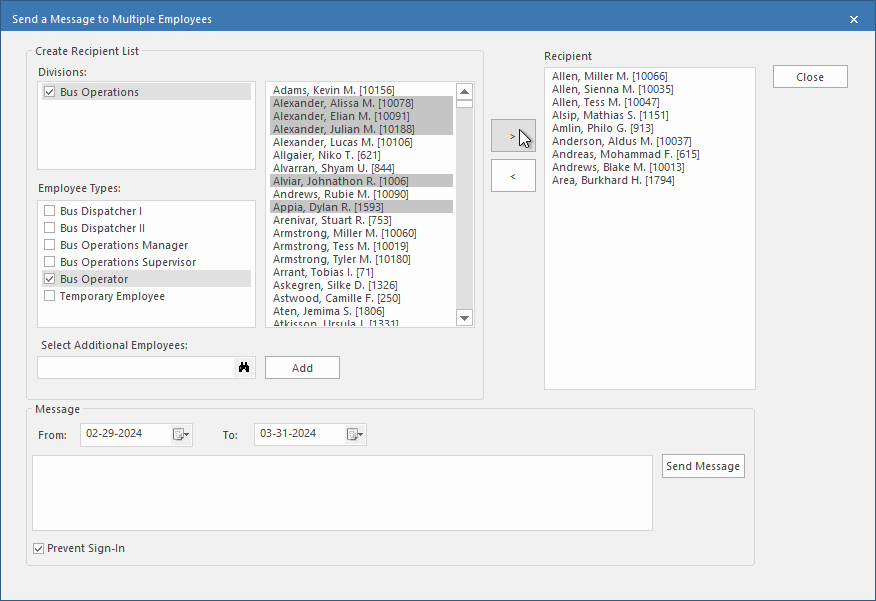
- Optional: Use the Select Additional Employees search field and select the Add button to add employees not covered by the division and employee type selections to the recipient list.
- Optional: Remove employees from the recipient list by selecting them and then the < button.
-
Enter the mass message text.
Messages have a 200-character limit.
- Optional: To prevent the employee from signing in during the message date range, select Prevent Sign-In.
- Select Send Message.