Creating New Employee Records

Before you create any employee profile you must create address types for the employees.

Before you begin

Employees must be open.

Procedure

  1. Click the Add New button.
    The General tab appears.
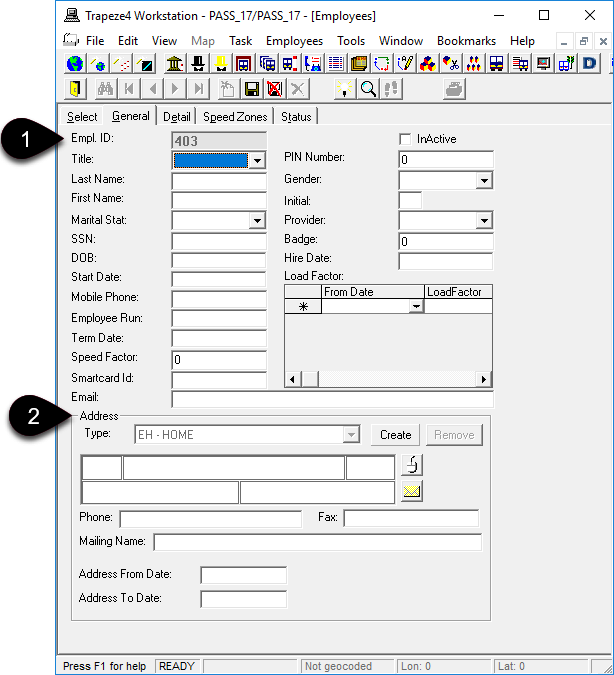
    The General tab in Employees with numbered call-outs. The call-outs are defined below the image.
    1
    The system generates and ID for each employee.
    2
    Depending on your system set up, address fields may appear on the Detail tab rather than on the General tab.
  2. Provide the following basic information:
    Information found in drop-down lists is typically created in ancillary data by a system administrator.
    1. Click the employee's Title.
    2. Required: Type the employee's Last Name.
    3. Required: Type the employee's First Name.
    4. Type the employee's middle Initial.
    5. Click the employee’s Marital Status in the list.
    6. Click the employee's Provider if associated or employed by one.
    7. Type the employee’s social security number (SSN) or social insurance number (SIN).
    8. Type the employee's Badge number.
    9. Type the employee's DOB (date of birth).
    10. Type the employee's Hire Date.
    11. Type the employee's Start Date.
    12. Type the employee's Mobile Phone number.
    13. In the Term Date field, type the termination date for the employee (if they no longer work for the agency).
    14. Type the employee’s Smart Card ID number.
    15. Type the employee's Email address.
  3. Add the employee's Address information:
    Depending on your system setup, Address fields may appear on the Detail tab instead of on the General tab.
    When you click the Create button, it is replaced by the Remove button. Click Remove only if you want to delete the current address.
    1. Click the employee's address Type. For example, EH - Employee Home.
      Address types are defined in ancillary data by a system administrator.
    2. Click the Create button.
    3. Type the employee's address (number, street, unit, city, state, zip code).
    4. Geocode the address using the Match Address button:
      Envelope.
    5. Type the Phone number for the employee at that address.
    6. Type the Fax number for the employee at that address.
    7. Type the Mailing Name for the employee at that address.
    8. Type the Address From Date and Address To Date for the employee at that address.
  4. If the employee is a driver, provide the following information:
    1. Type the PIN Number for the employee. This is a personal identification number that can be used at employee information kiosks.
    2. In the Employee Run field, type the run to which the employee is assigned by default.
    3. Type the employee's Speed Factor.
      Speed factors determines the speed at which the employee is allowed to travel and are applied to distance and time calculation when attached to a run.

      For example, the average speed set in the system is 50 mph. To decrease the speed of a new driver to 80% of the average speed, type 80 in this field. The system uses the calculation 50 × 0.8 = 40 to set the speed of the driver at 40 mph.

      The actual speed is calculated when all speed factors in the system are applied.

    4. Define the Load Factor information.
      Load factors are defined in minutes and are used to set the amount of time the driver needs to load a vehicle with passenger and equipment. Multiple From Dates can be defined to automatically update employee load factors.
  5. Click the Save button:
    Diskette.

Results

A new employee record is created.