You can upload pre-configured Crystal Reports into the system.
Before you begin
Report Designer must be open.
About this task
If your site has Crystal Reports XI and a report writer, use them to create these
files. Otherwise, contact Trapeze Customer Care for help with these files.
Procedure
-
Click the New button:

The
New Report dialog box appears.
By default, the
Ad Hoc
Bookings is selected.
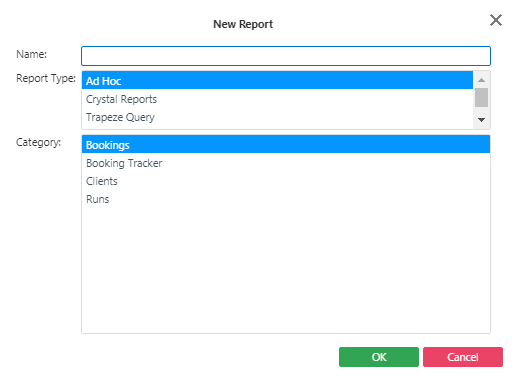
-
Do the following:
-
Type a Name for the report.
This name can be changed later if needed.
-
In the Report Type list, click Crystal
Reports.
-
Click OK.
The
Edit step appears with the
Edit step button highlighted

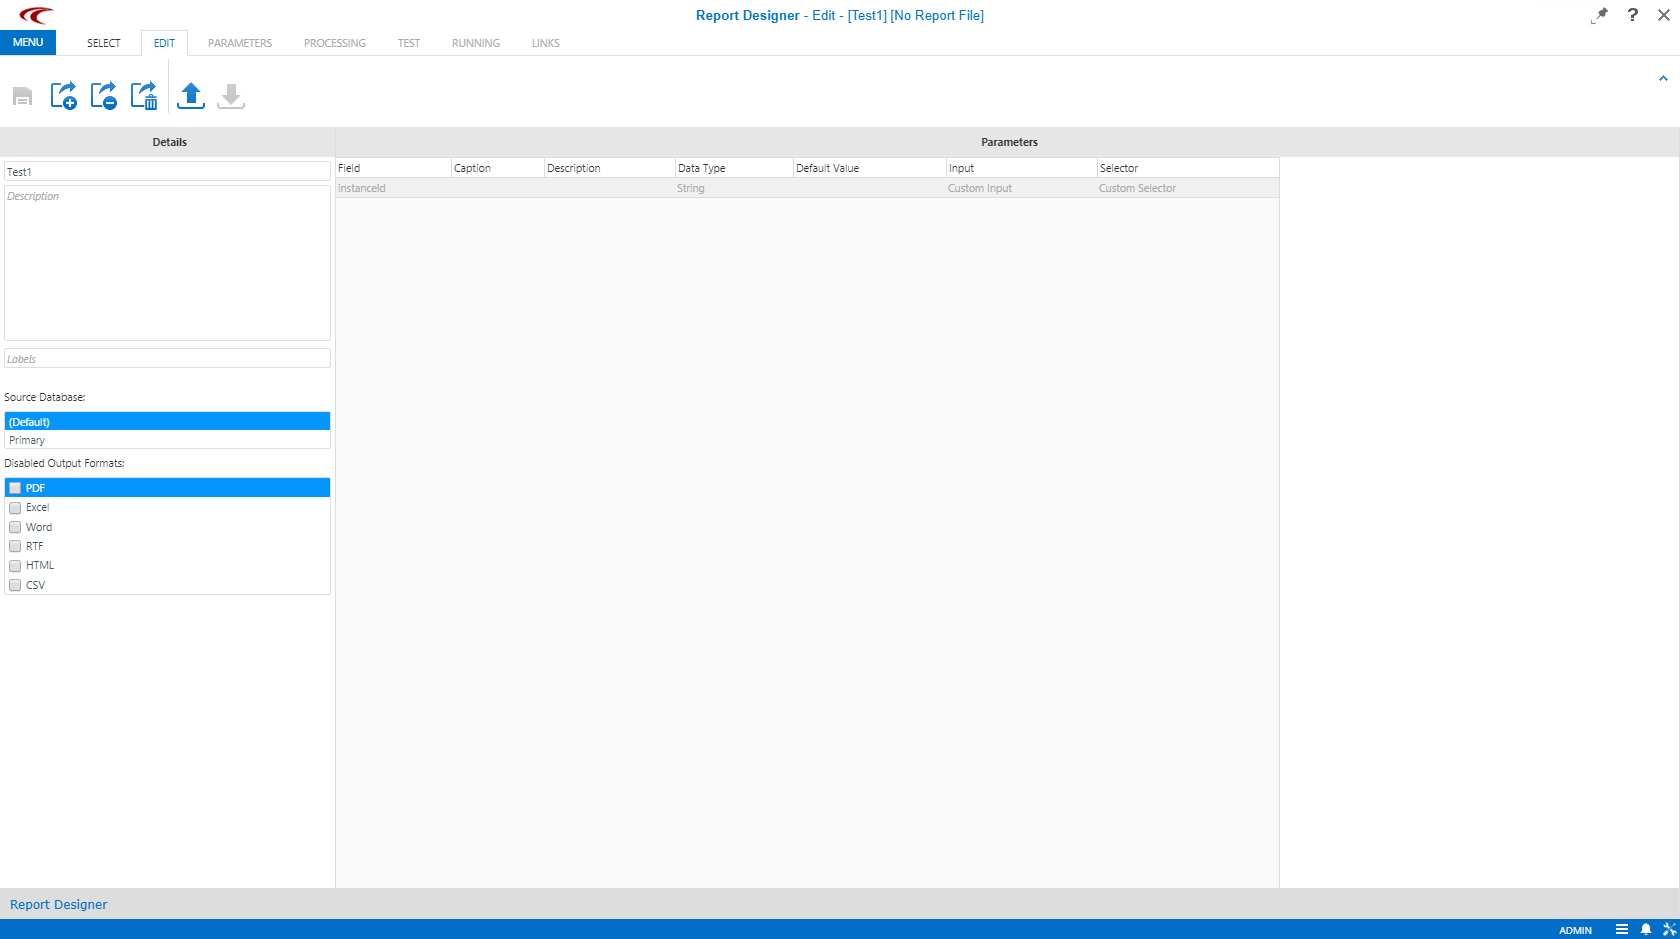
The report name appears in the Title field of the
Details pane.
- Optional:
In the Description field, type a report description.
The description appears in the upper-right pane on the Test
step.
-
Click the Upload Crystal Report button.

The
File Upload dialog box appears.
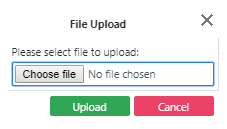
-
Do the following:
-
Click Choose File.
The Choose File dialog box appears.
-
Browse to the report location, select the Crystal Reports file, and click
Open.
Trapeze recommends that all report files be kept in a known location on the PASS
server.
By default, report files are saved in
C:\Documents and Settings\All
Users\Application Data\Trapeze\<PASS
application>\<data source
name>\Reports\Archive\YYYYMMDD.
To use a different folder
for archived reports, set the context property.
Contact your system administrator for more
information.
-
Click Upload.