Setting the Context in the Bus Graphs Screen
When you open the Bus Graphs screen, you must set the context before performing any tasks.
-
On the main toolbar, click the Bus Graph button:
 The Bus Graph screen appears.
 -
Click or press F3.
The Context dialog appears.
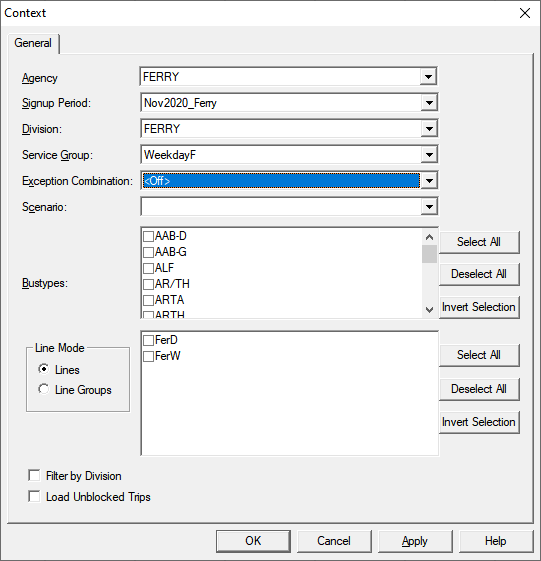
- From the Signup Period list, select the sign-up period you want.
- From the Division list, select the divisions of the blocks you want to view.
- From the Service Group list, select the service group.
- From the Exception Combination list, select the applicable exception combination, if any.
- From the Scenario list, select a previously created scenario.
- In the Bustypes frame, select the vehicle types you want to include or apply a Selection option. See Selection Options for more information on the buttons beside the Bustypes frame.
- In the Line Groups frame, select the line groups of the blocks you want to include or apply a Selection option. See Selection Options for more information on the buttons beside the Line Groups frame.
-
To display specific types of blocks, select the appropriate check box:
- Filter by Division: If selected, only the blocks of the
selected divisions are displayed. If not selected, all the blocks of all divisions in
the sign-up period are displayed even if you have selected a division in the
Division list.Note: Blocks in a sign-up period can be assigned to different divisions.
- Load Unblocked Trips: If selected, the unblocked trips are displayed.
- Filter by Division: If selected, only the blocks of the
selected divisions are displayed. If not selected, all the blocks of all divisions in
the sign-up period are displayed even if you have selected a division in the
Division list.
- Click Apply.
- Click OK.