Setting the Context in the Travels Screen
Setting the context in the Travels screen check the travels data of a service group from the selected sign-up period.
-
With the Travels screen open, click View > Context
or press F3.
The Context dialog is displayed.
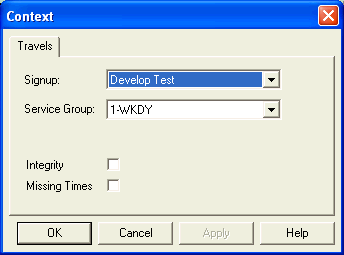
- From the Signup list, select the sign-up period for which you want to see the Travel records.
- From the Service Group list, select the appropriate service group.
-
To check the travels data, select one or both of the following check boxes:
- Integrity - Select for travels with overlapping time intervals.
- Missing Times - Select for travels that do not have both Paid and Actual times.
If you selected Missing Times , the records that have empty Paid Time and Act Time columns are also shown in the Travels grid.
- Click Apply.
- Click OK.